Getting Started with Real-Time Analytics on MySQL Using Rockset
June 1, 2021

MySQL and PostgreSQL are widely used as transactional databases. When it comes to supporting high-scale and analytical use cases, you may often have to tune and configure these databases, which leads to a higher operational burden. Some challenges when doing analytics on MySQL and Postgres include:
- running a large number of concurrent queries/users
- working with large data sizes
- needing to define and manage tons of indexes.
There are workarounds for these problems, but it requires more operational burden:
- scaling to larger servers
- creating more read replicas
- moving to a NoSQL database
Rockset recently announced support for MySQL and PostgreSQL that easily allows you to power real-time, complex analytical queries. This mitigates the need to tune these relational databases to handle heavy analytical workloads.
By integrating MySQL and PostgreSQL with Rockset, you can easily scale out to handle demanding analytics.
Preface
In the twitch stream 👇, we did an integration with RDS MySQL on Rockset. This means all the setup will be related to Amazon Relational Database Service (RDS) and Amazon Database Migration Service (DMS). Before getting started, go ahead and create an AWS and Rockset account.
I will cover the main highlights of what we did in the twitch stream in this blog. If you’re unsure about certain parts of the instructions, definitely check out the video down below.
Set Up MySQL Server
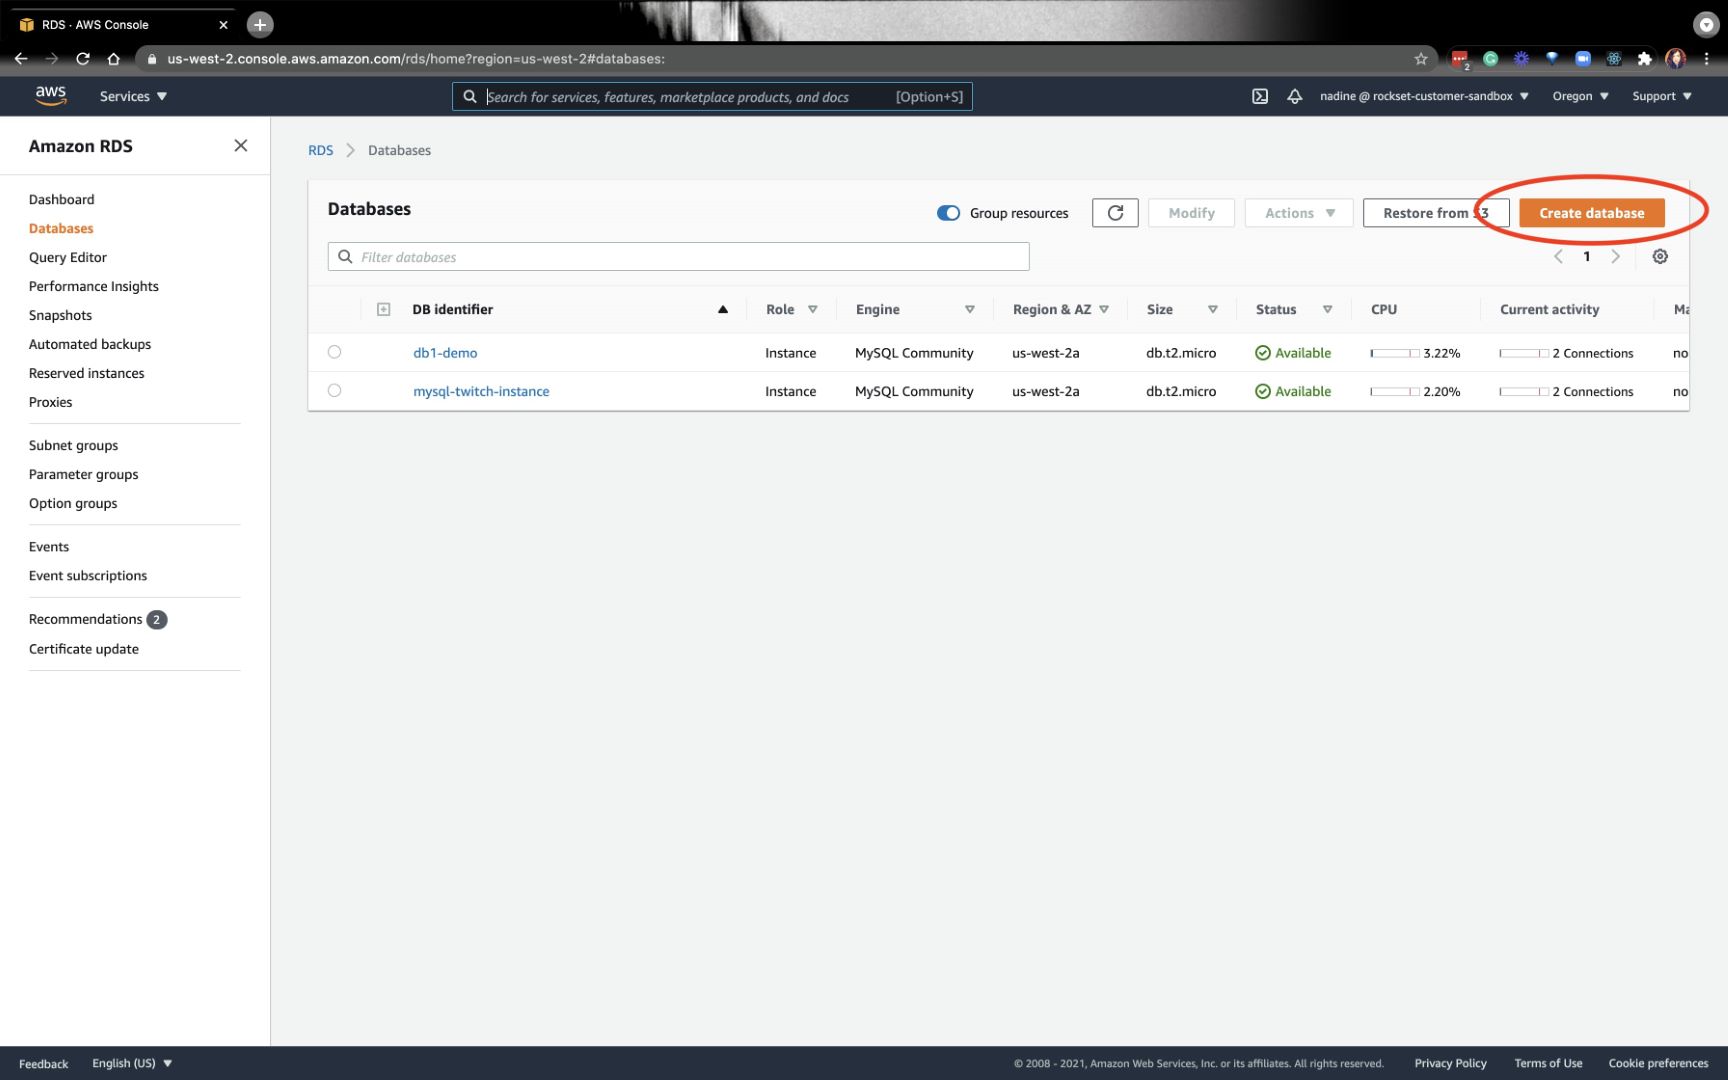
In our stream, we created a MySQL server on Amazon RDS. You can click on Create database on the upper right-hand corner and work through the instructions:
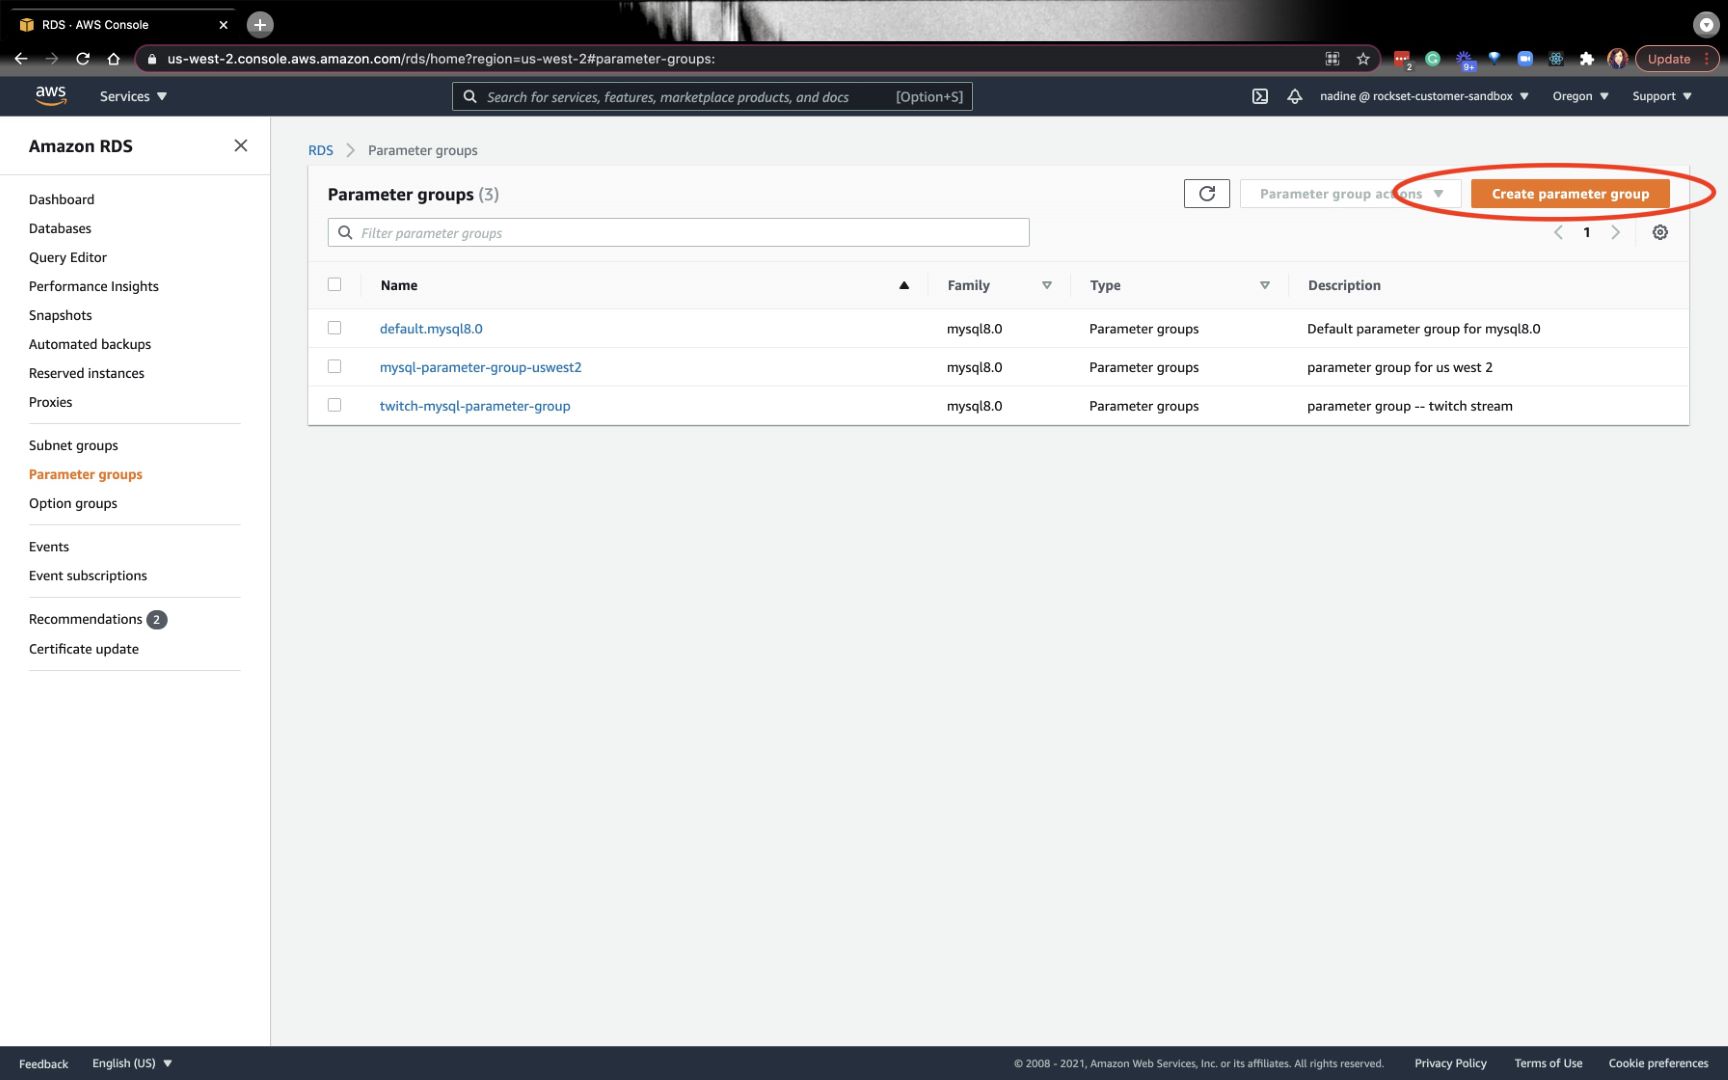
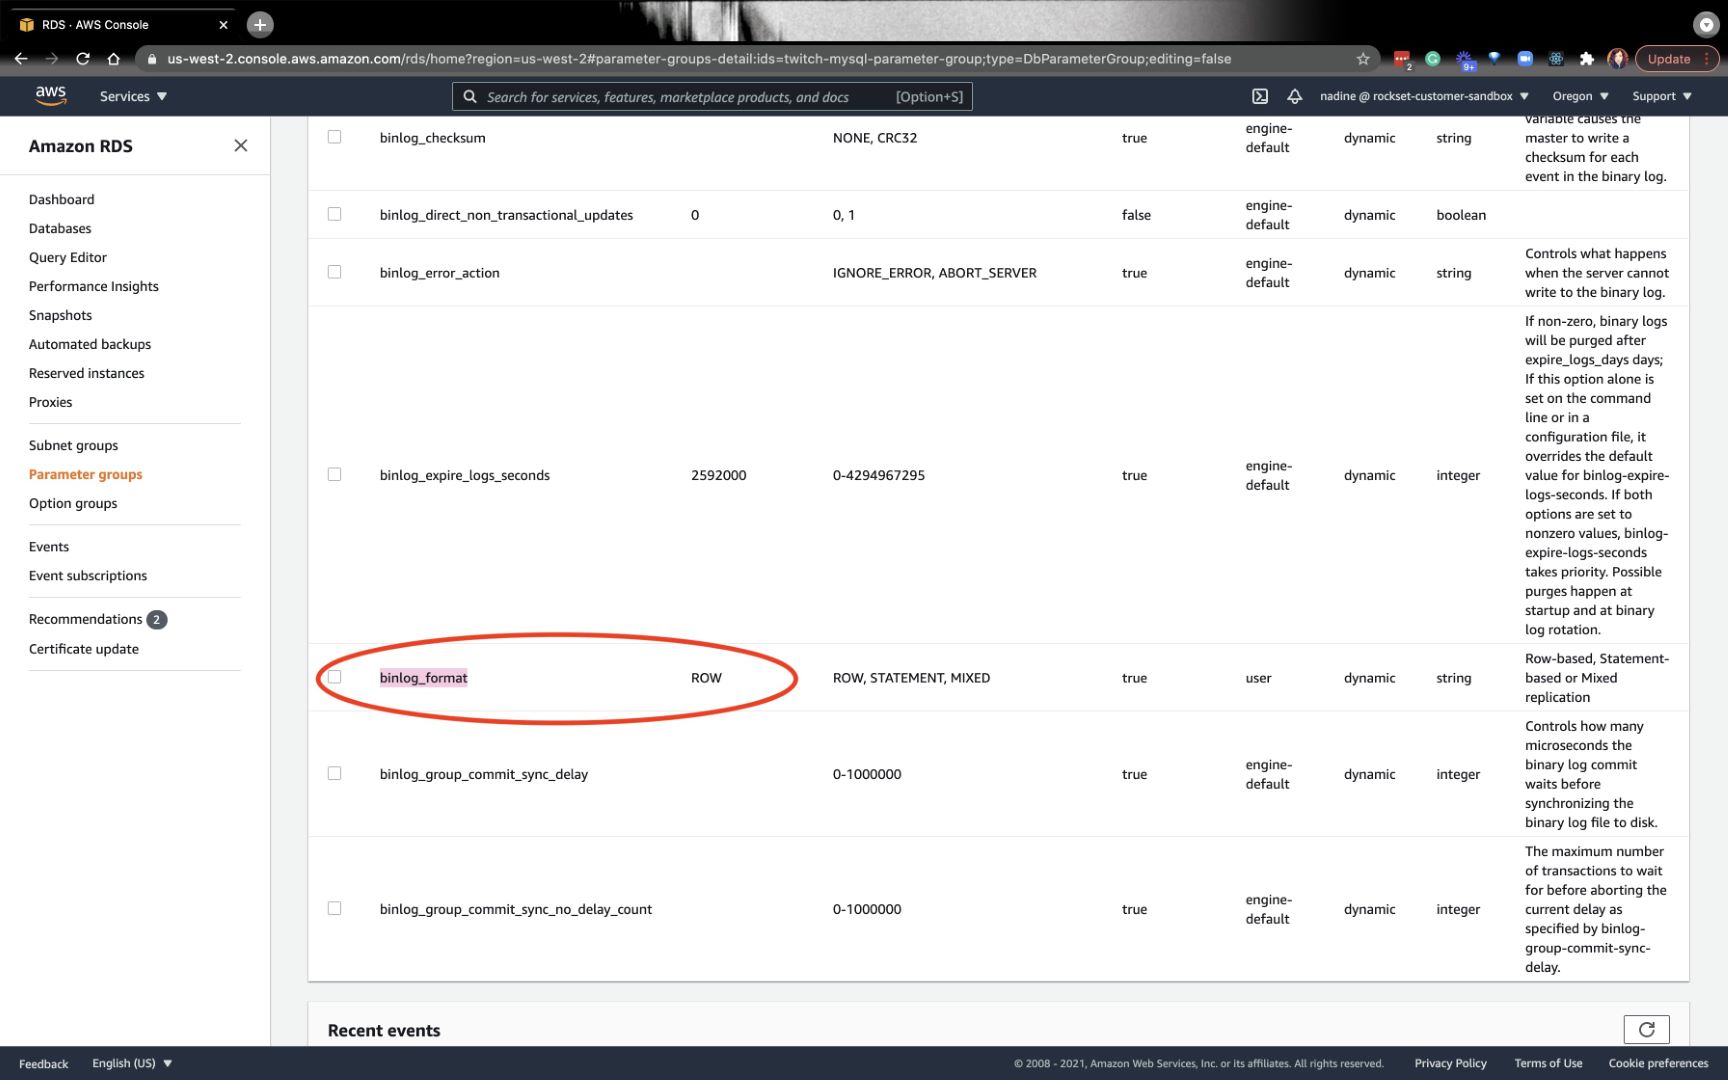
Now, we’ll create the parameter groups. By creating a parameter group, we’ll be able to change the binlog_format to Row so we can dynamically update Rockset as the data changes in MySQL. Click on Create parameter group on the upper right-hand corner:
After you create your parameter group, you want to click on the newly created group and change binlog_format to Row:
After this is set, you want to access the MySQL server from the CLI so you can set the permissions. You can grab the endpoint from the Databases tab on the left and under the Connectivity & security settings:
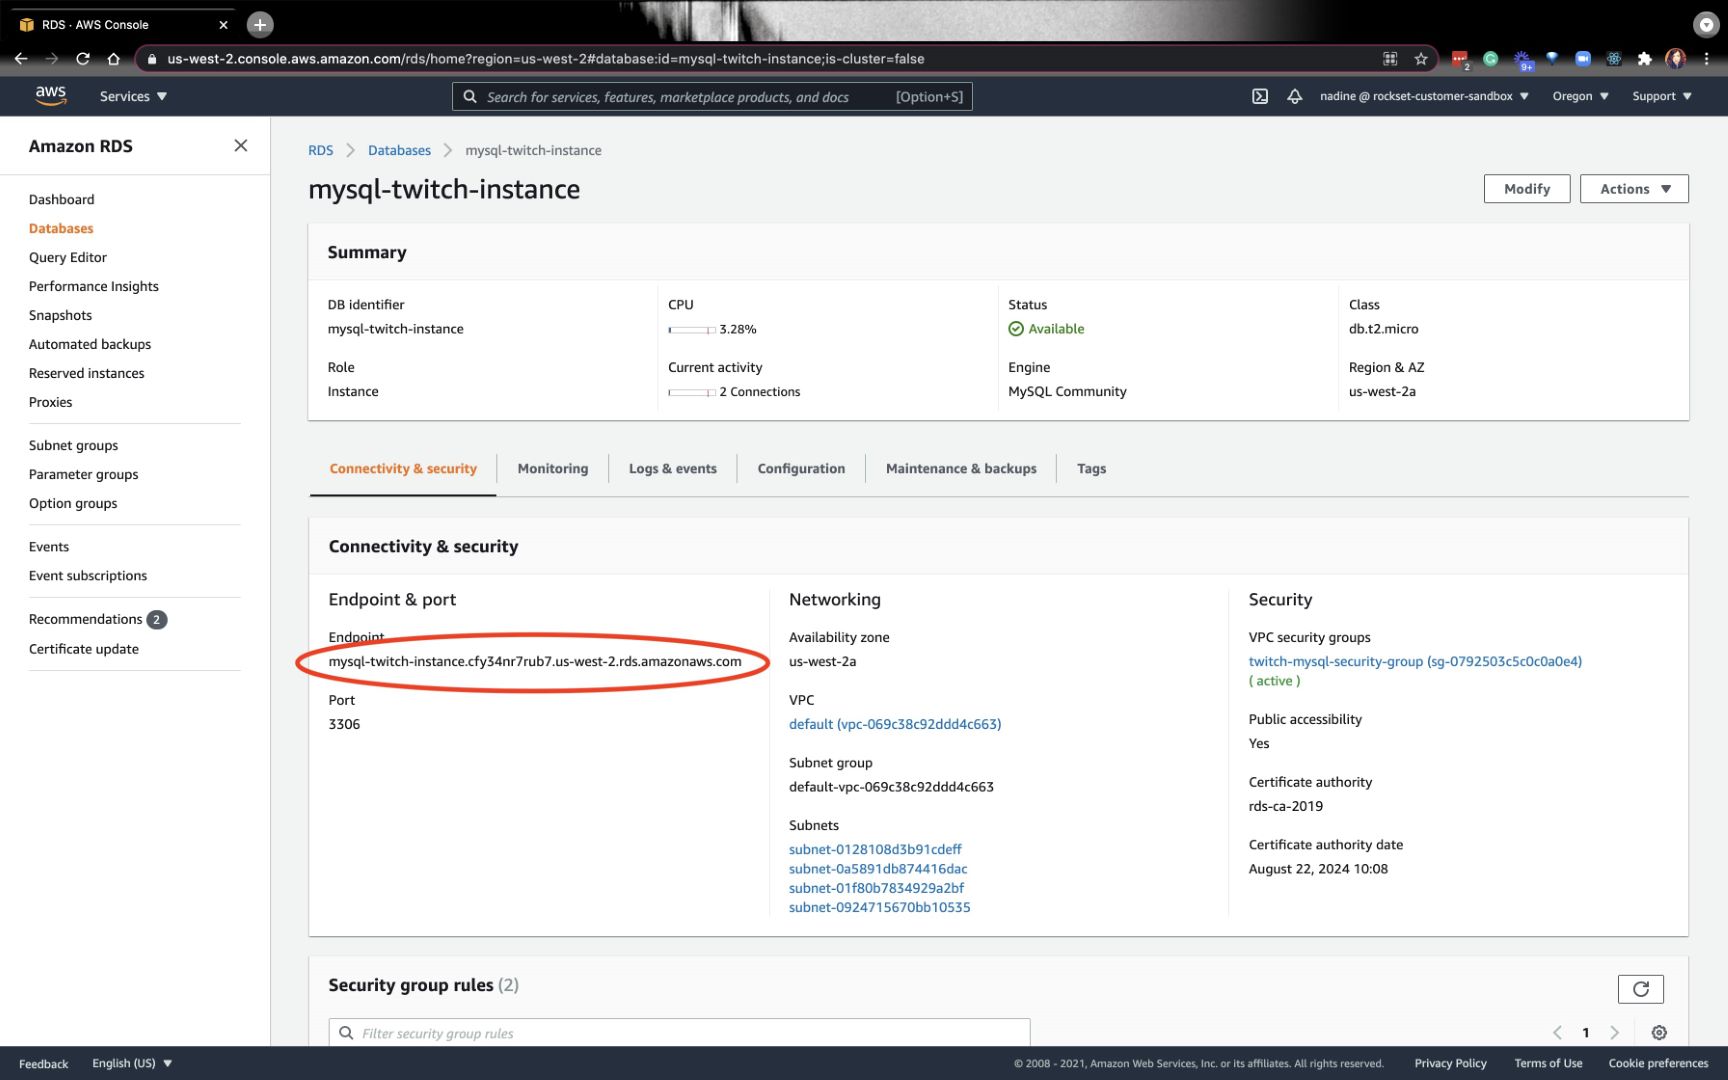
On terminal, type
$ mysql -u admin -p -h Endpoint
It’ll prompt you for the password.
Once inside, you want to type this:
mysql> CREATE USER 'aws-dms' IDENTIFIED BY 'youRpassword';
mysql> GRANT SELECT ON *.* TO 'aws-dms';
mysql> GRANT REPLICATION SLAVE ON *.* TO  'aws-dms';
mysql> GRANT REPLICATION CLIENT ON *.* TO  'aws-dms';
This is probably a good point to create a table and insert some data. I did this part a little later in the stream, but you can easily do it here too.
mysql> use yourDatabaseName
mysql> CREATE TABLE MyGuests ( id INT(6) UNSIGNED AUTO_INCREMENT PRIMARY KEY, firstname VARCHAR(30) NOT NULL, lastname VARCHAR(30) NOT NULL, email VARCHAR(50), reg_date TIMESTAMP DEFAULT CURRENT_TIMESTAMP ON UPDATE CURRENT_TIMESTAMP );
mysql> INSERT INTO MyGuests (firstname, lastname, email)
-> VALUES ('John', 'Doe', 'john@example.com');
mysql> show tables;
That’s a wrap for this section. We set up a MySQL server, table, and inserted some data.
Create a Target AWS Kinesis Stream
Each table on MySQL will map to 1 Kinesis Data Stream. The AWS Kinesis Stream is the destination that DMS uses as the target of a migration job. Every MySQL table we wish to connect to Rockset will require an individual migration task.
To summarize: Each table on MySQL table will require a Kinesis Data Stream and a migration task.
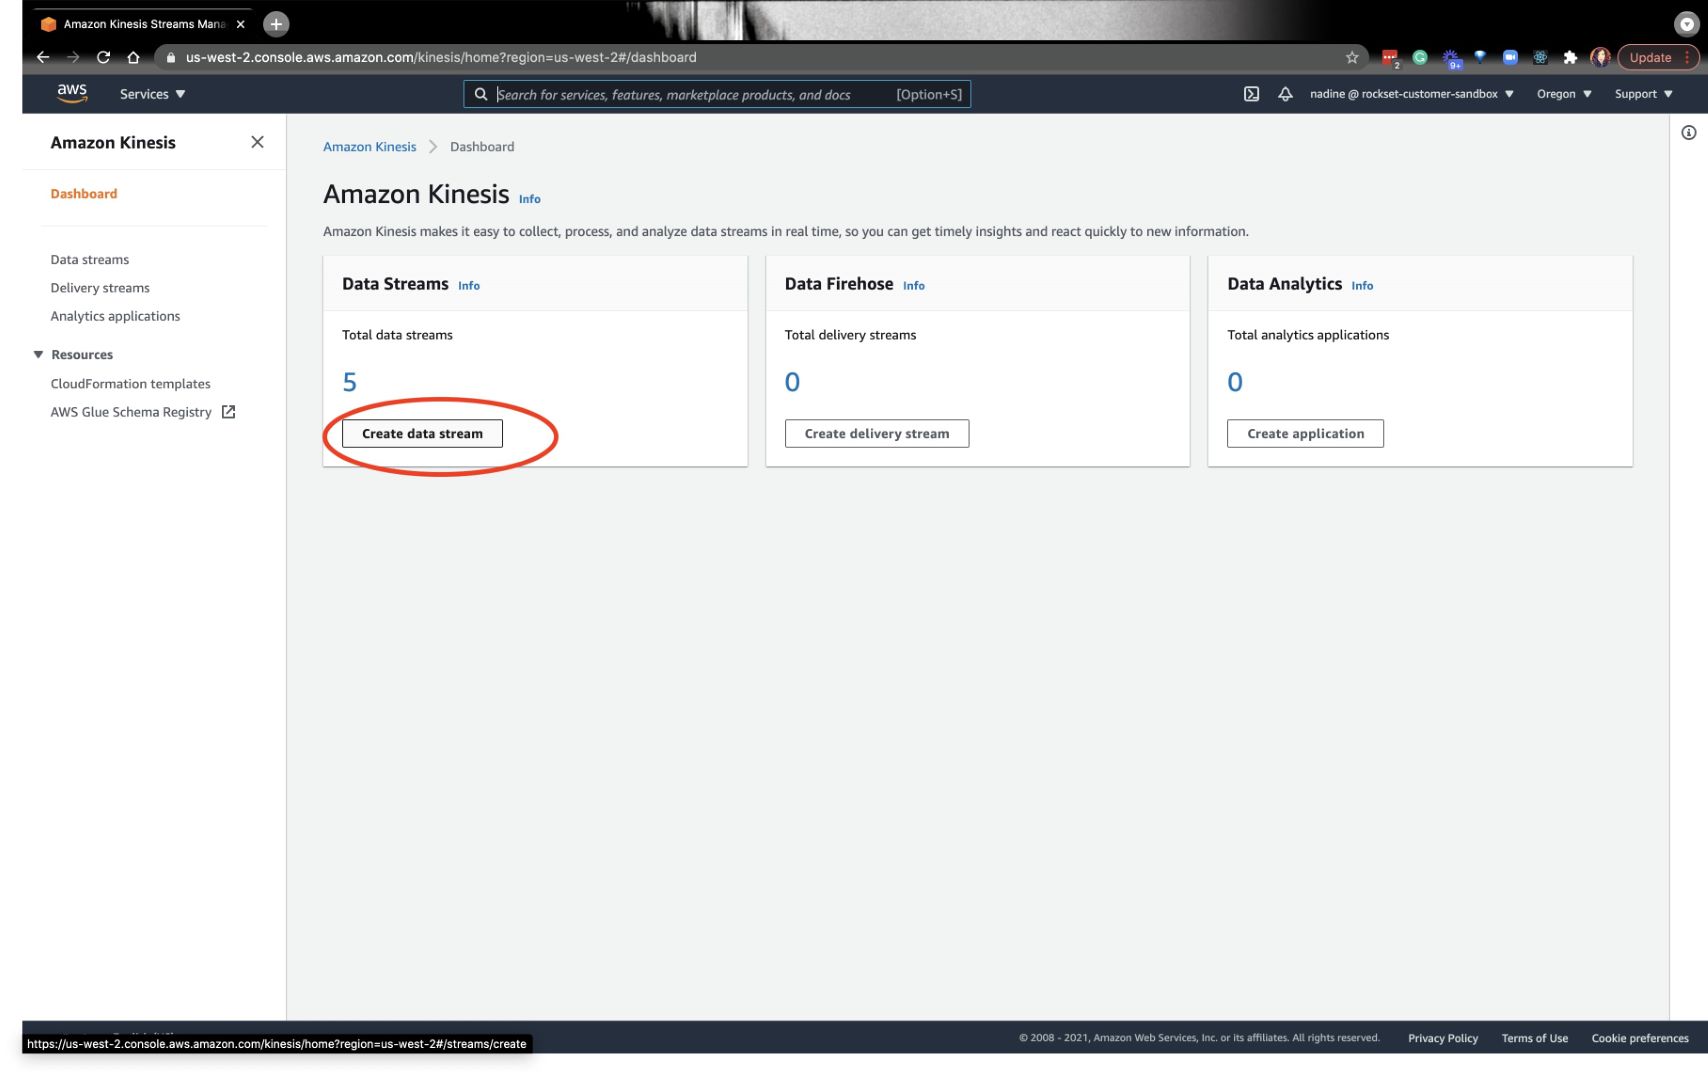
Go ahead and navigate to the Kinesis Data Stream and create a stream:
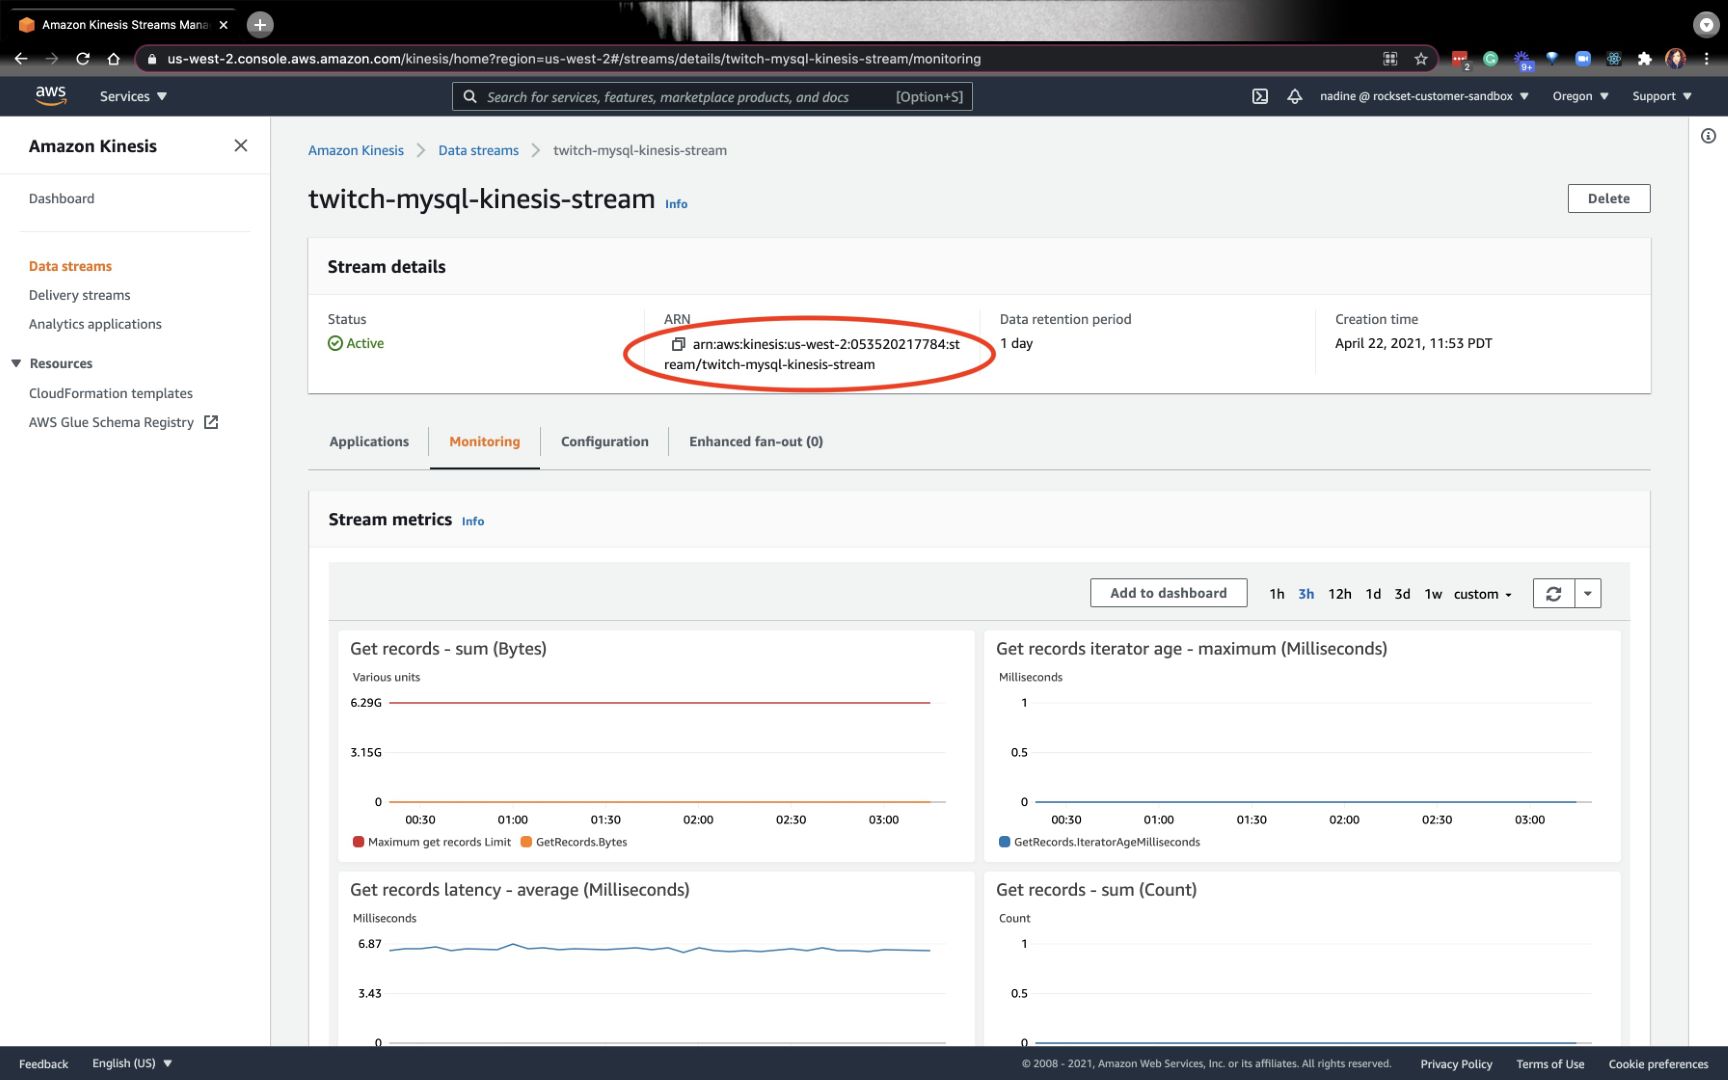
Be sure to bookmark the ARN for your stream — we’re going to need it later:
Create an AWS DMS Replication Instance and Migration Task
Now, we’re going to navigate to AWS DMS (Data Migration Service). The first thing we are going to do is create a source endpoint and a target endpoint:
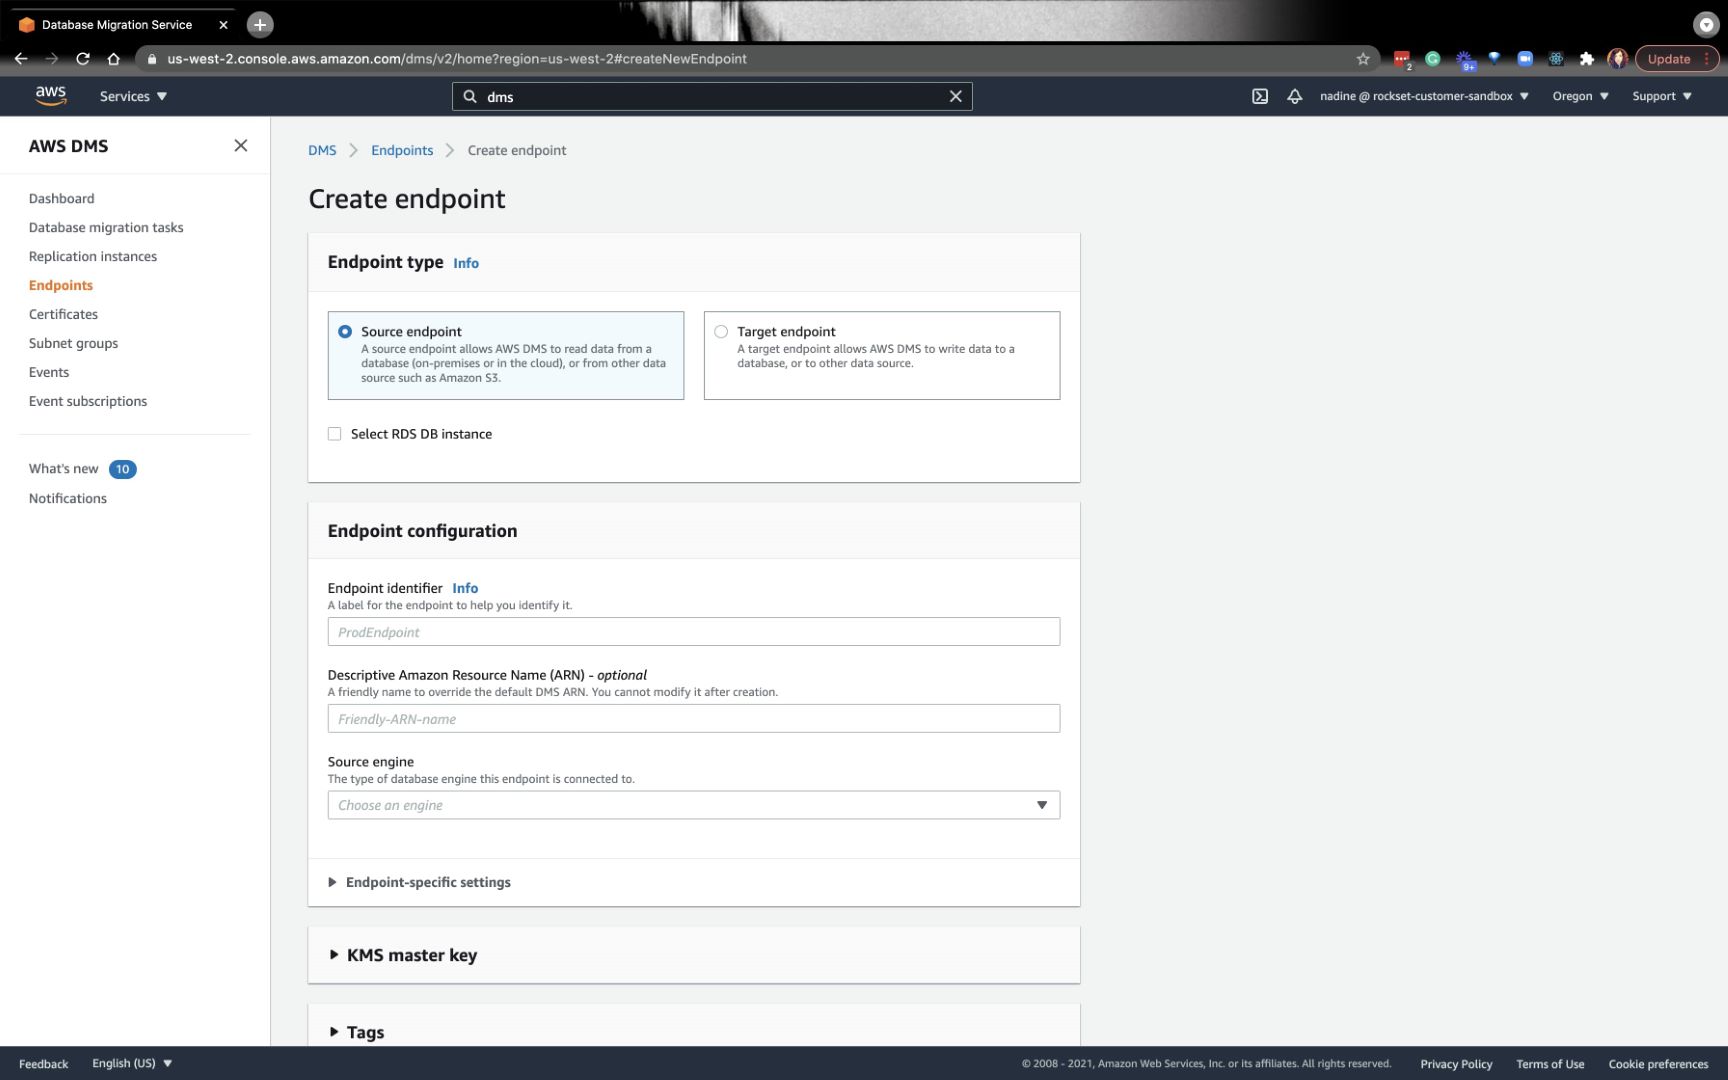
When you create the target endpoint, you’ll need the Kinesis Stream ARN that we created earlier. You’ll also need the Service access role ARN. If you don’t have this role, you’ll need to create it on the AWS IAM console. You can find more details about how to create this role in the stream shown down below.
From there, we’ll create the replication instances and data migration tasks. You can basically follow this part of the instructions on our docs or watch the stream.
Once the data migration task is successful, you’re ready for the Rockset portion!
Scaling MySQL analytical workloads on Rockset
Once MySQL is connected to Rockset, any data changes done on MySQL will register on Rockset. You’ll be able to scale your workloads effortlessly as well. When you first create a MySQL integration, click on RDS MySQL you’ll see prompts to ensure that you did the various setup instructions we just covered above.
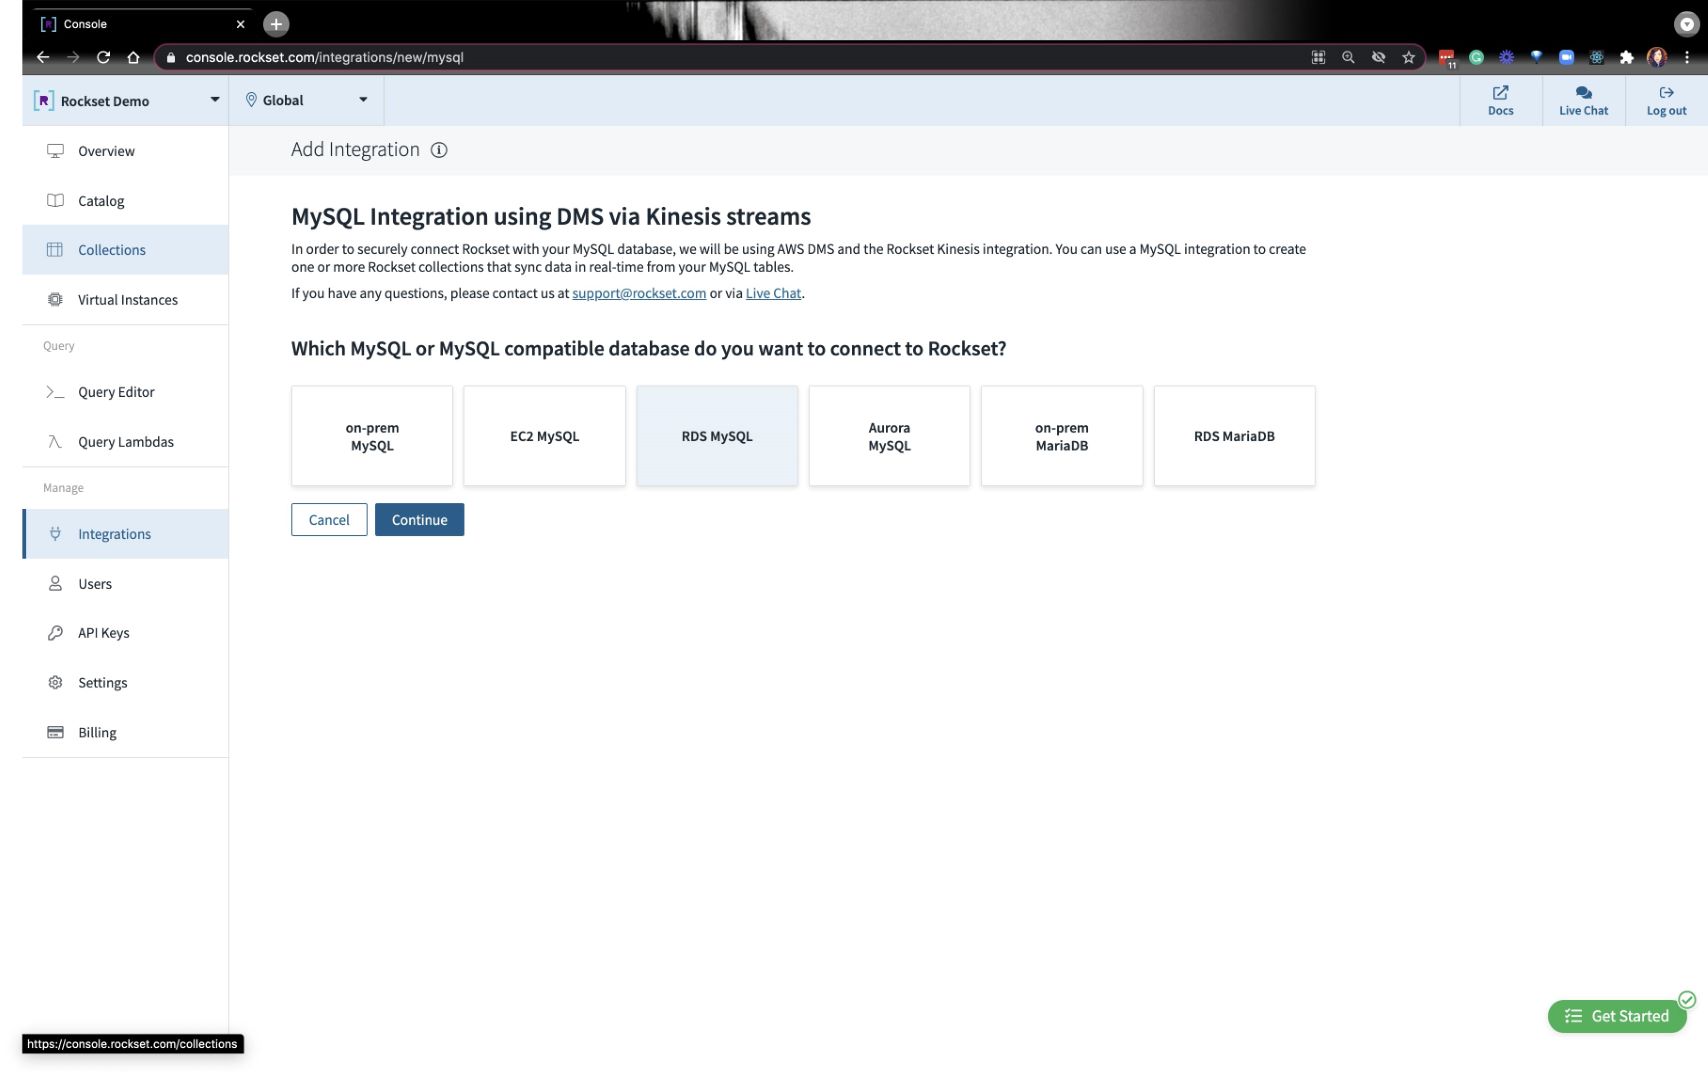
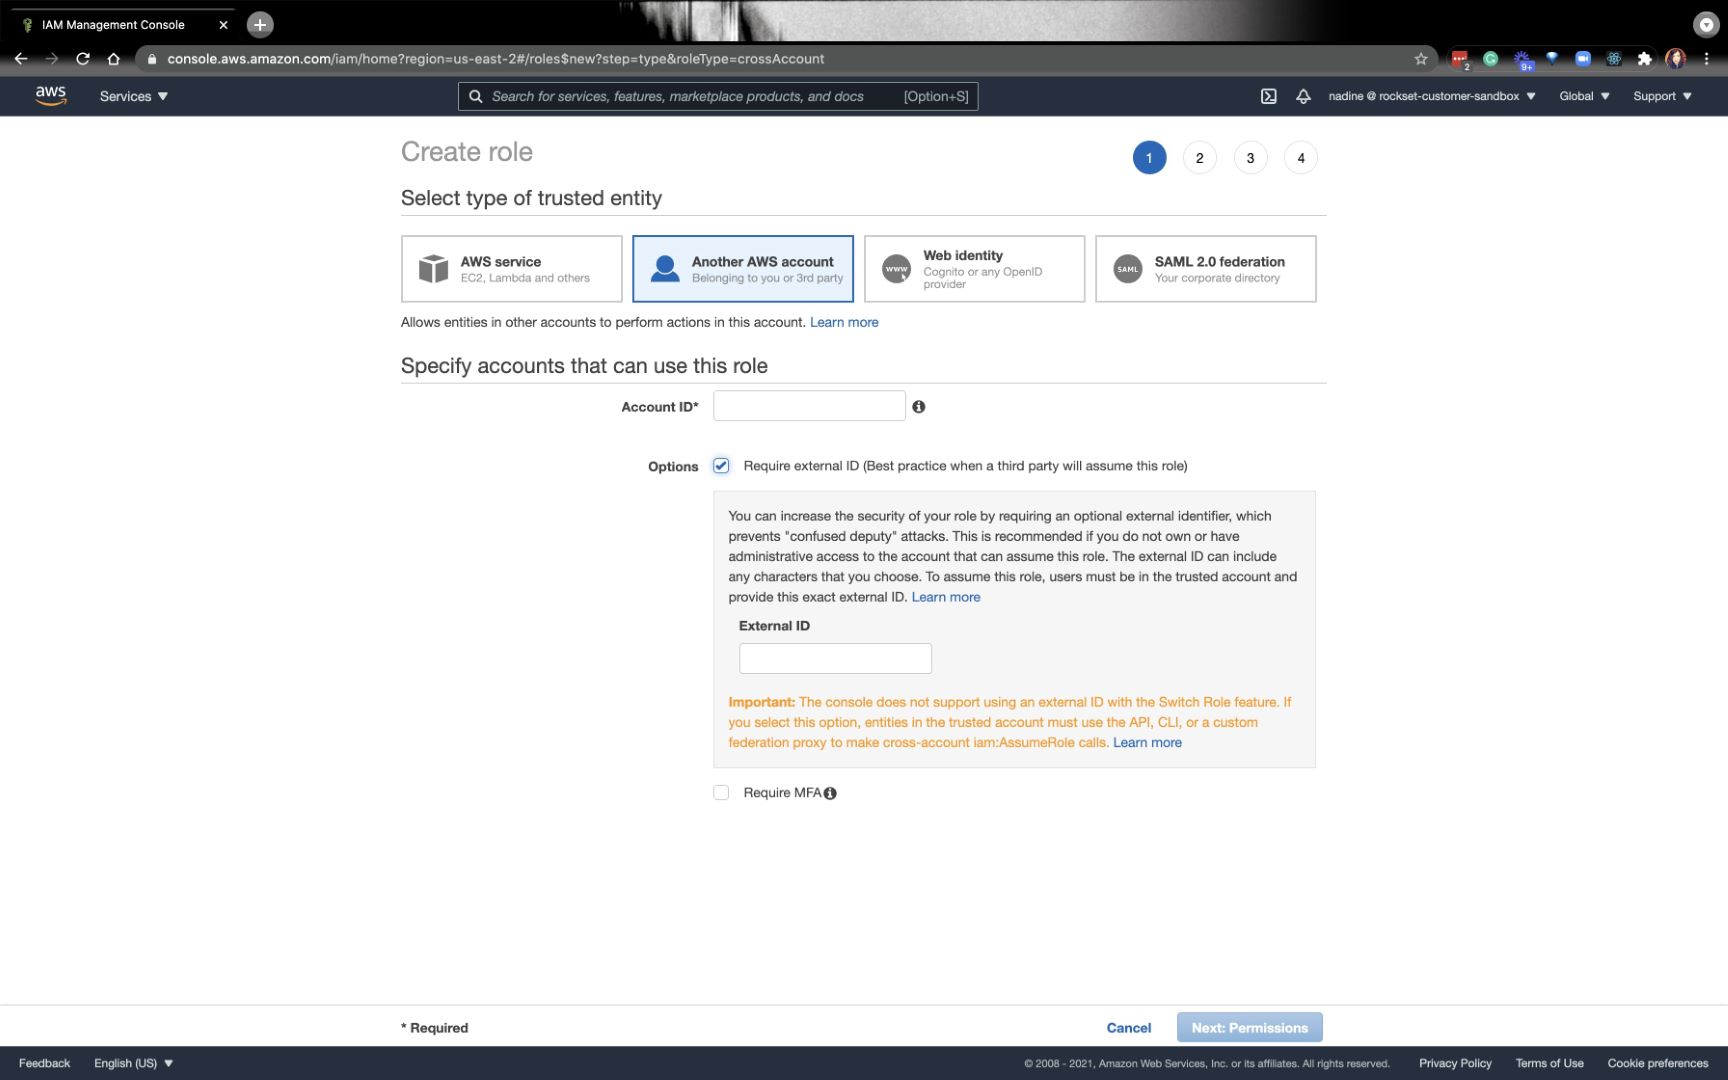
The last thing you’ll need to do is create a specific IAM role with Rockset’s Account ID and External ID:
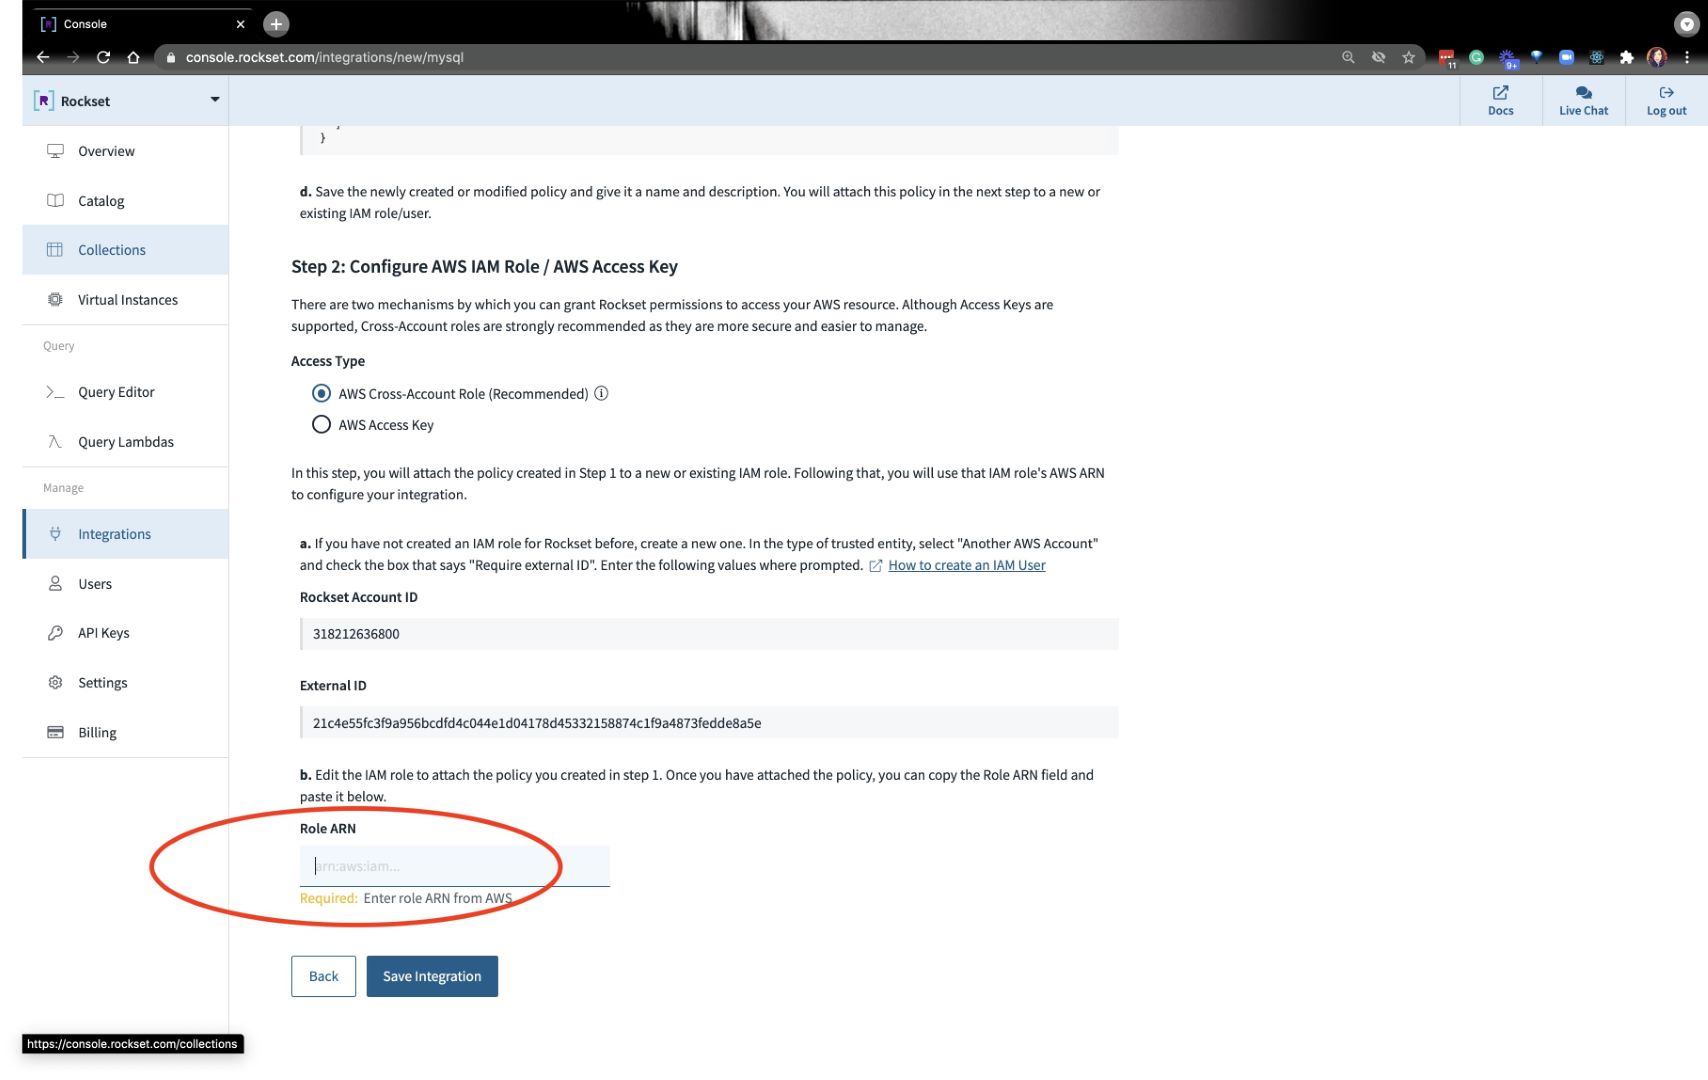
You’ll grab the ARN from the role we created and paste it at the bottom where it requires that information:
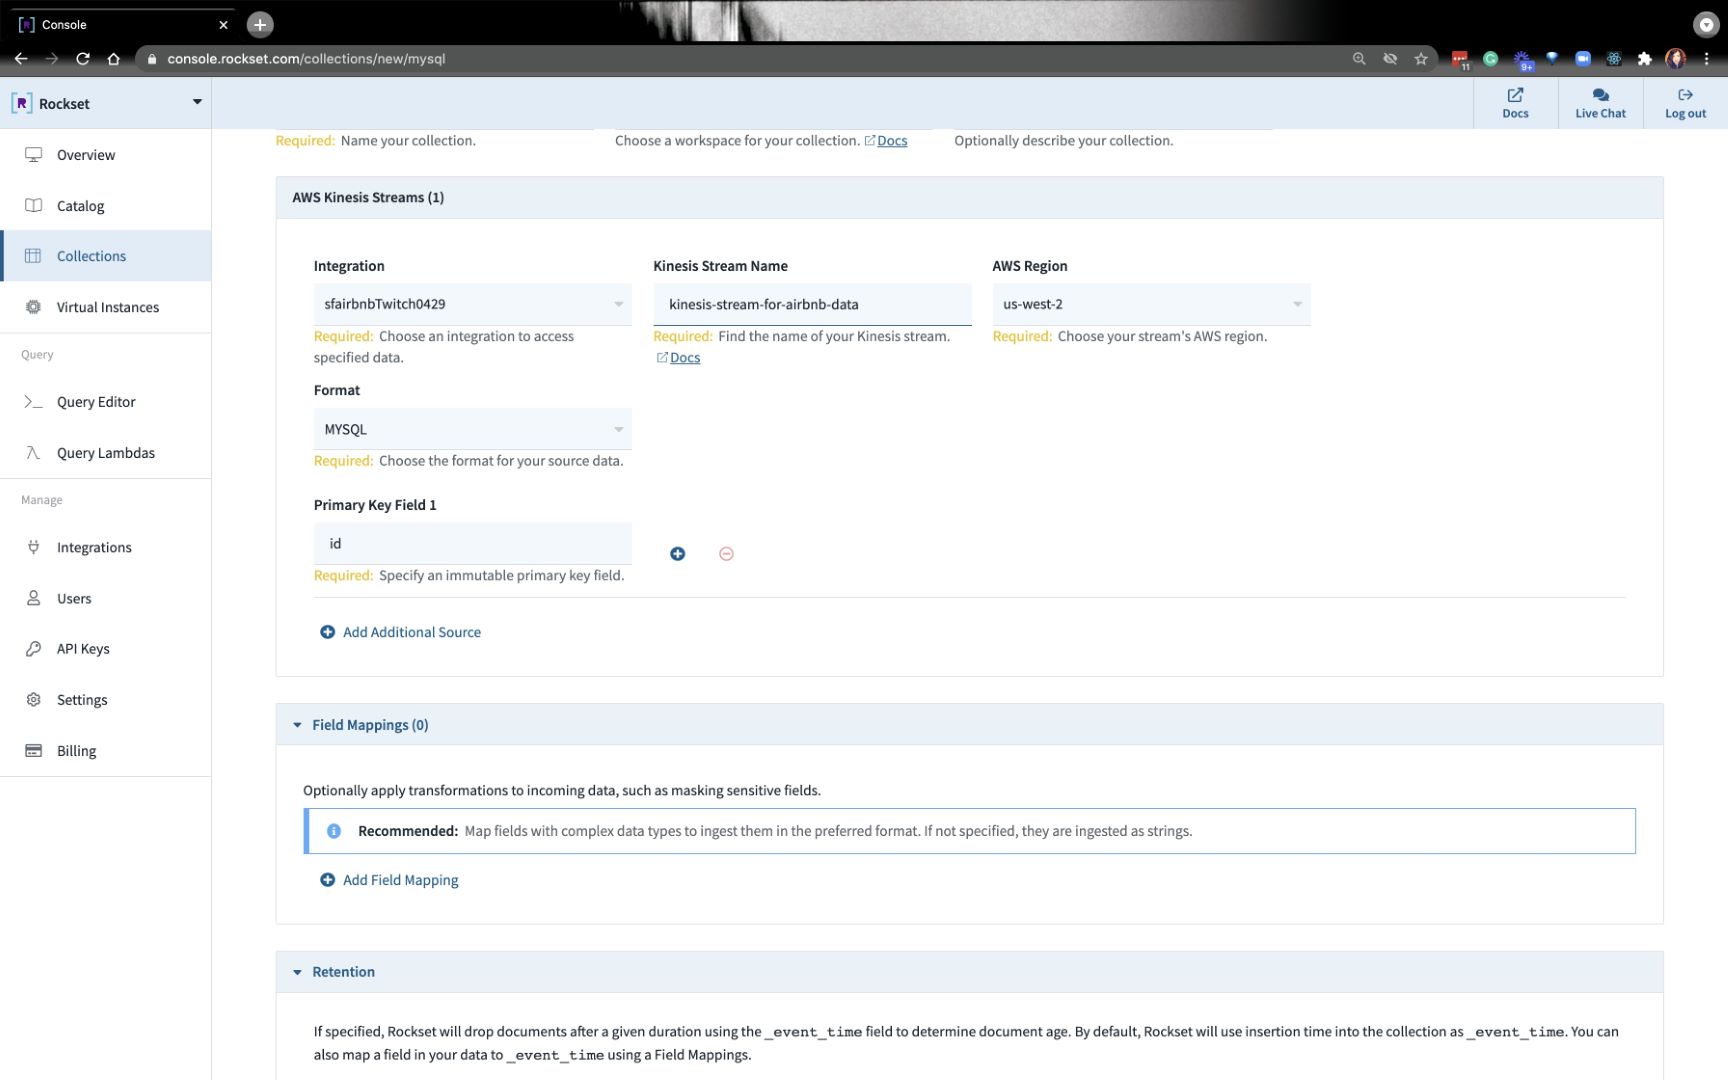
Once the integration is set up, you’ll need to create a collection. Go ahead and put it your collection name, AWS region, and Kinesis stream information:
After a minute or so, you should be able to query your data that’s coming in from MySQL!
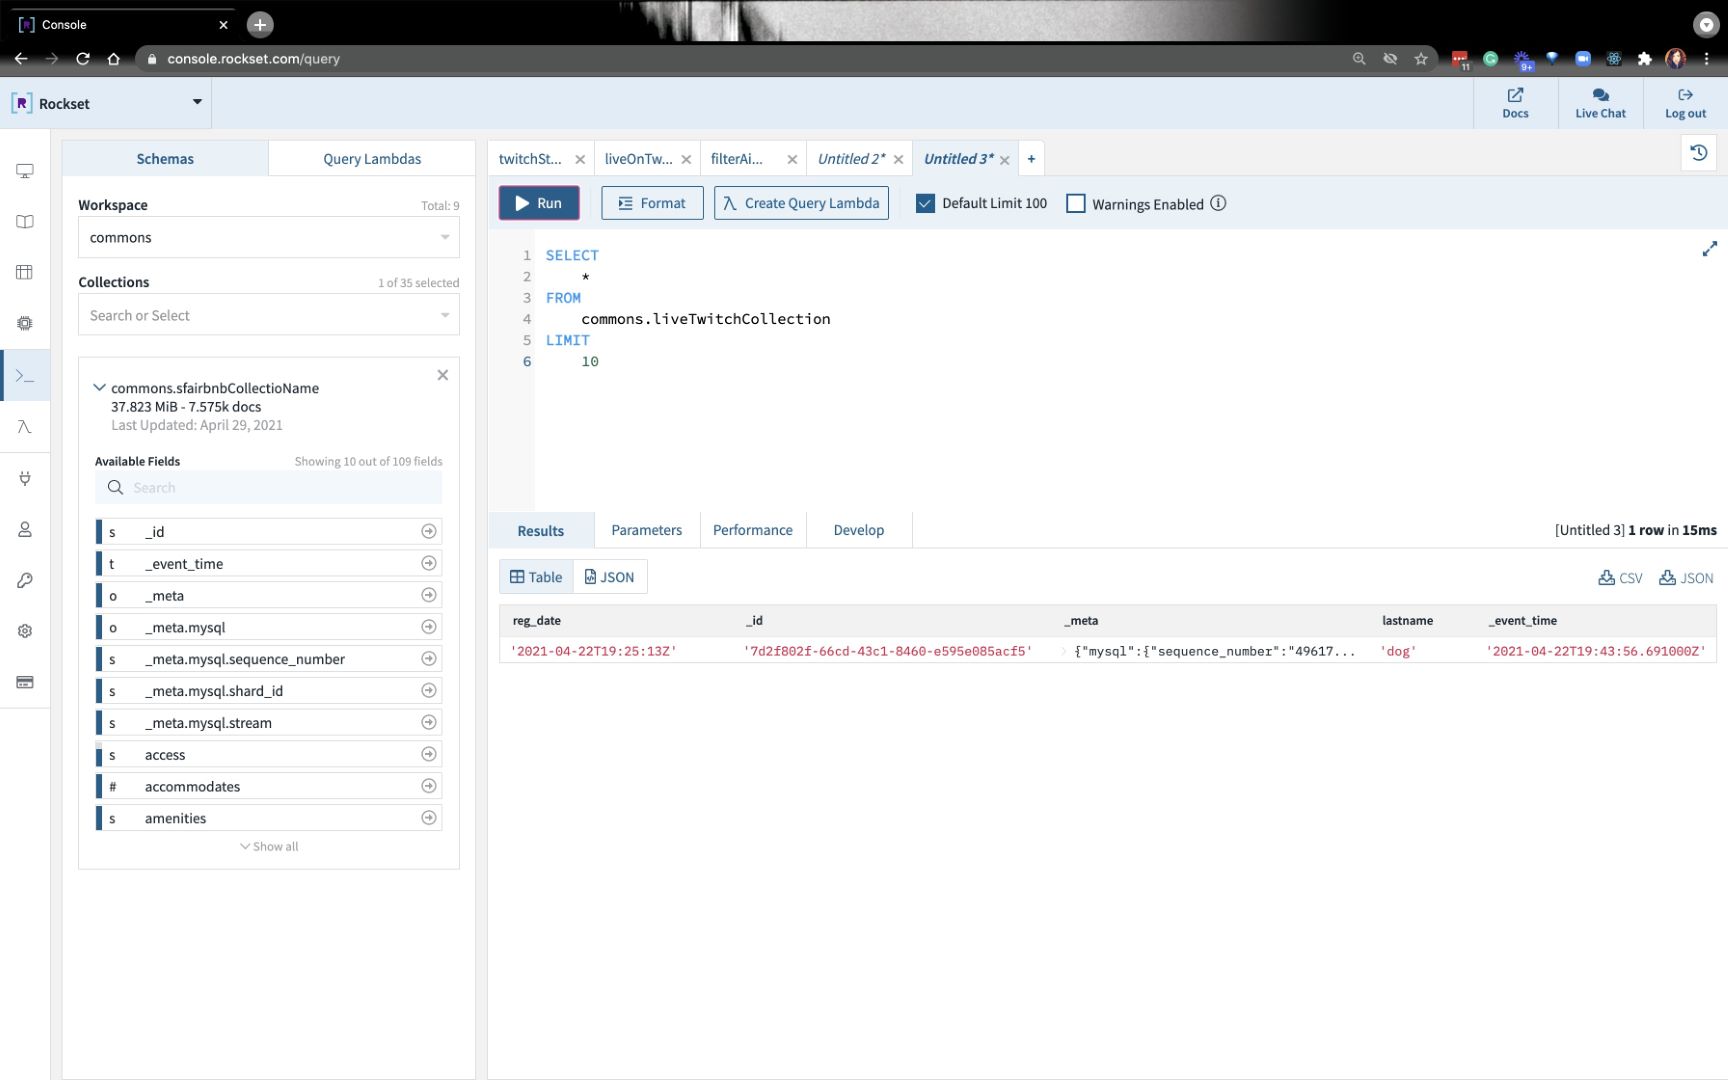
We just did a simple insert into MySQL to test if everything is working correctly. In the next blog, we’ll create a new table and upload data to it. We’ll work on a few SQL queries.
You can catch the full replay of how we did this end-to-end here: Embedded content: https://youtu.be/oNtmJl2CZf8
Or you can follow the instructions on docs.
TLDR: you can find all the resources you need in the developer corner.