
Quickstart
10-minute Rockset Tutorial
Sign Up
Sign-up for a Rockset account using a GitHub account, Google account, or your email address. During the course of your two-week trial, you will have $300 worth of credits to use however you see fit. No credit card required! Billing is determined by your compute (Virtual Instance size) and storage usage. After your trial ends, you can continue to use Rockset for free by using the FREE Virtual Instance and staying below the 2GB of free storage.
Trial Credit Tip
If you’re using a larger Virtual Instance for your trial, switch back to a smaller VI when you’re not actively using it to save credit!
For more information on Billing, click here.
Create a Collection
Now that you've created an account and understand how to use your $300 free trial credits, let's navigate to the Collections tab of the Rockset Console where we will create your first collection!
A Collection in Rockset is a set of Rockset documents (similar to tables in traditional SQL databases) and can be queried using SQL, either directly or using Query Lambdas.
In this tutorial, we will create two collections from public datasets hosted on AWS S3:
- The Movies Dataset: Film Releases: A set of movies and their metadata (genre, revenue, etc).
- The Movies Dataset: Film Ratings: A set of movie ratings by user.
Both datasets are publicly available here.
Create the Film Releases Collection
Follow the steps below to create the Film Releases collection:
-
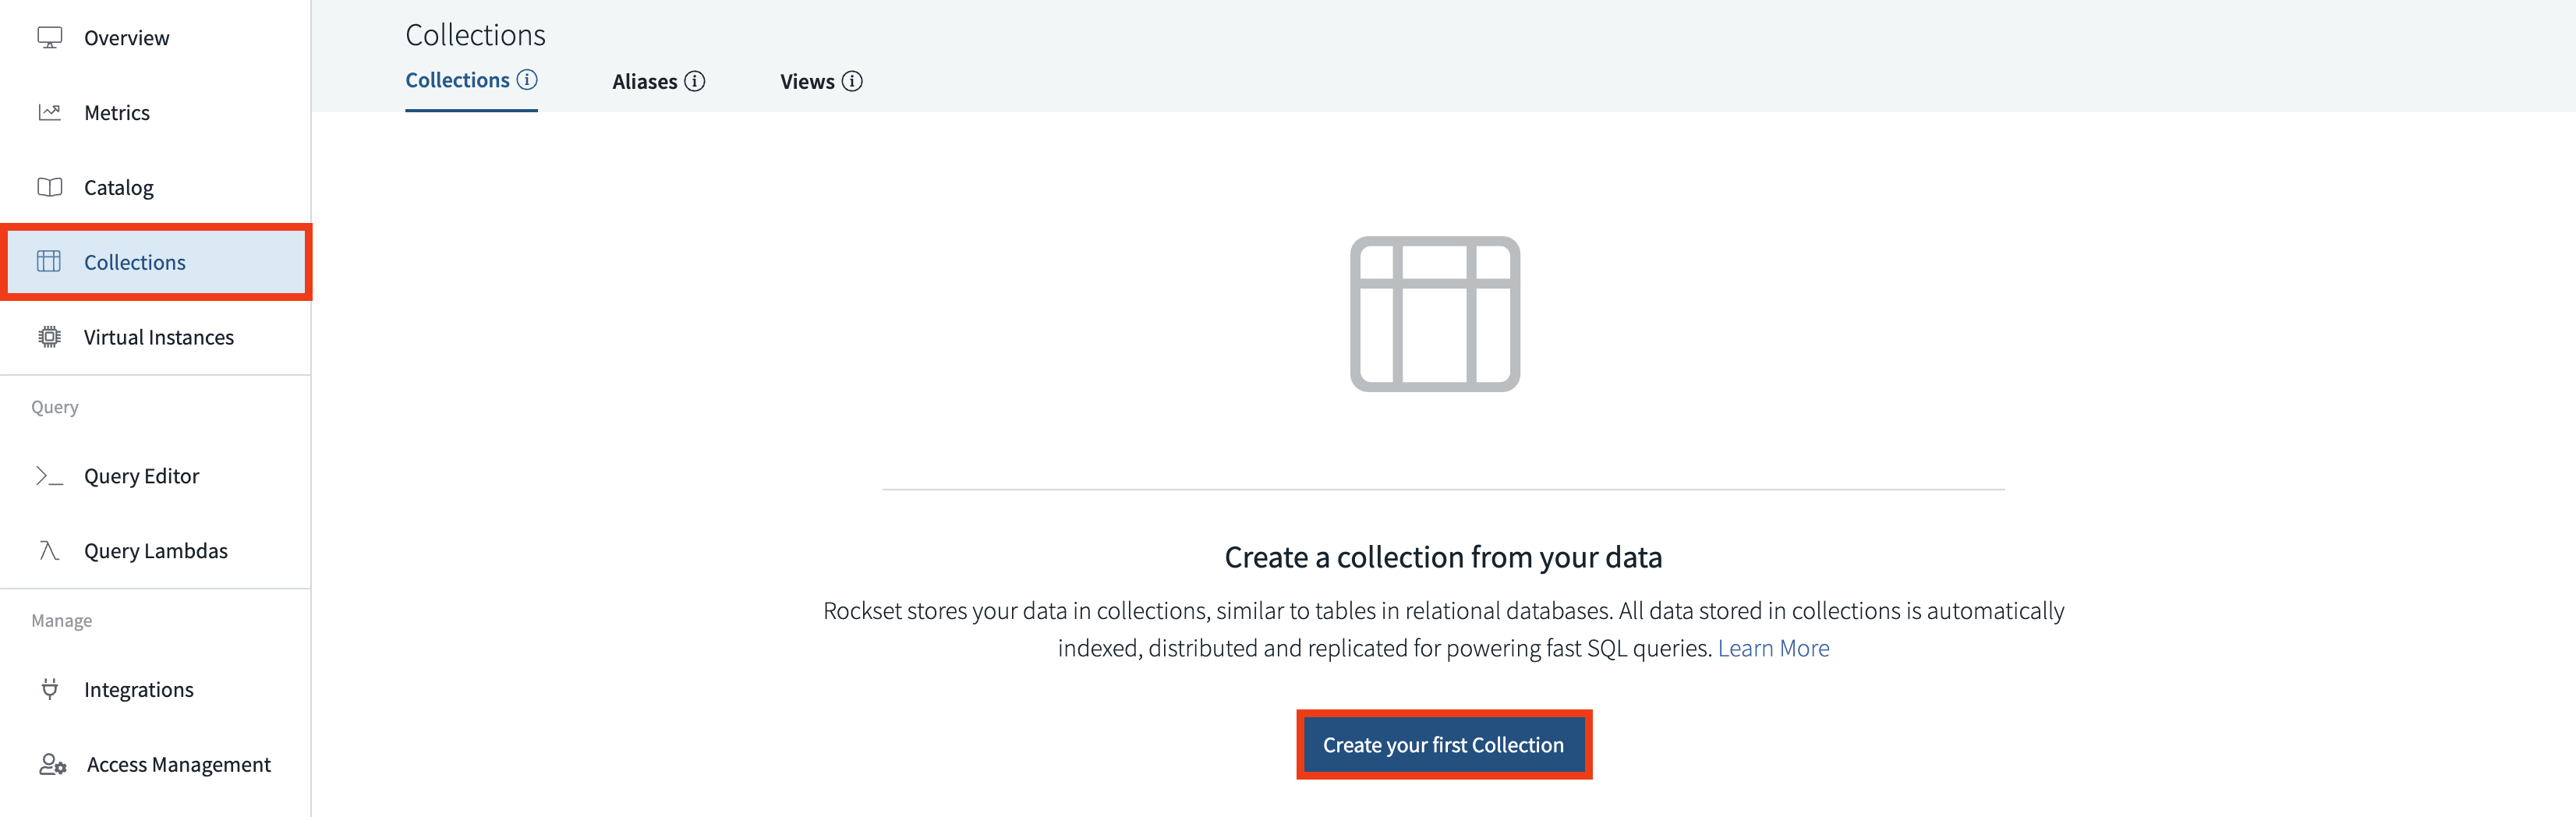
Click "Create your first Collection" in the Collections tab of the Rockset Console:
-
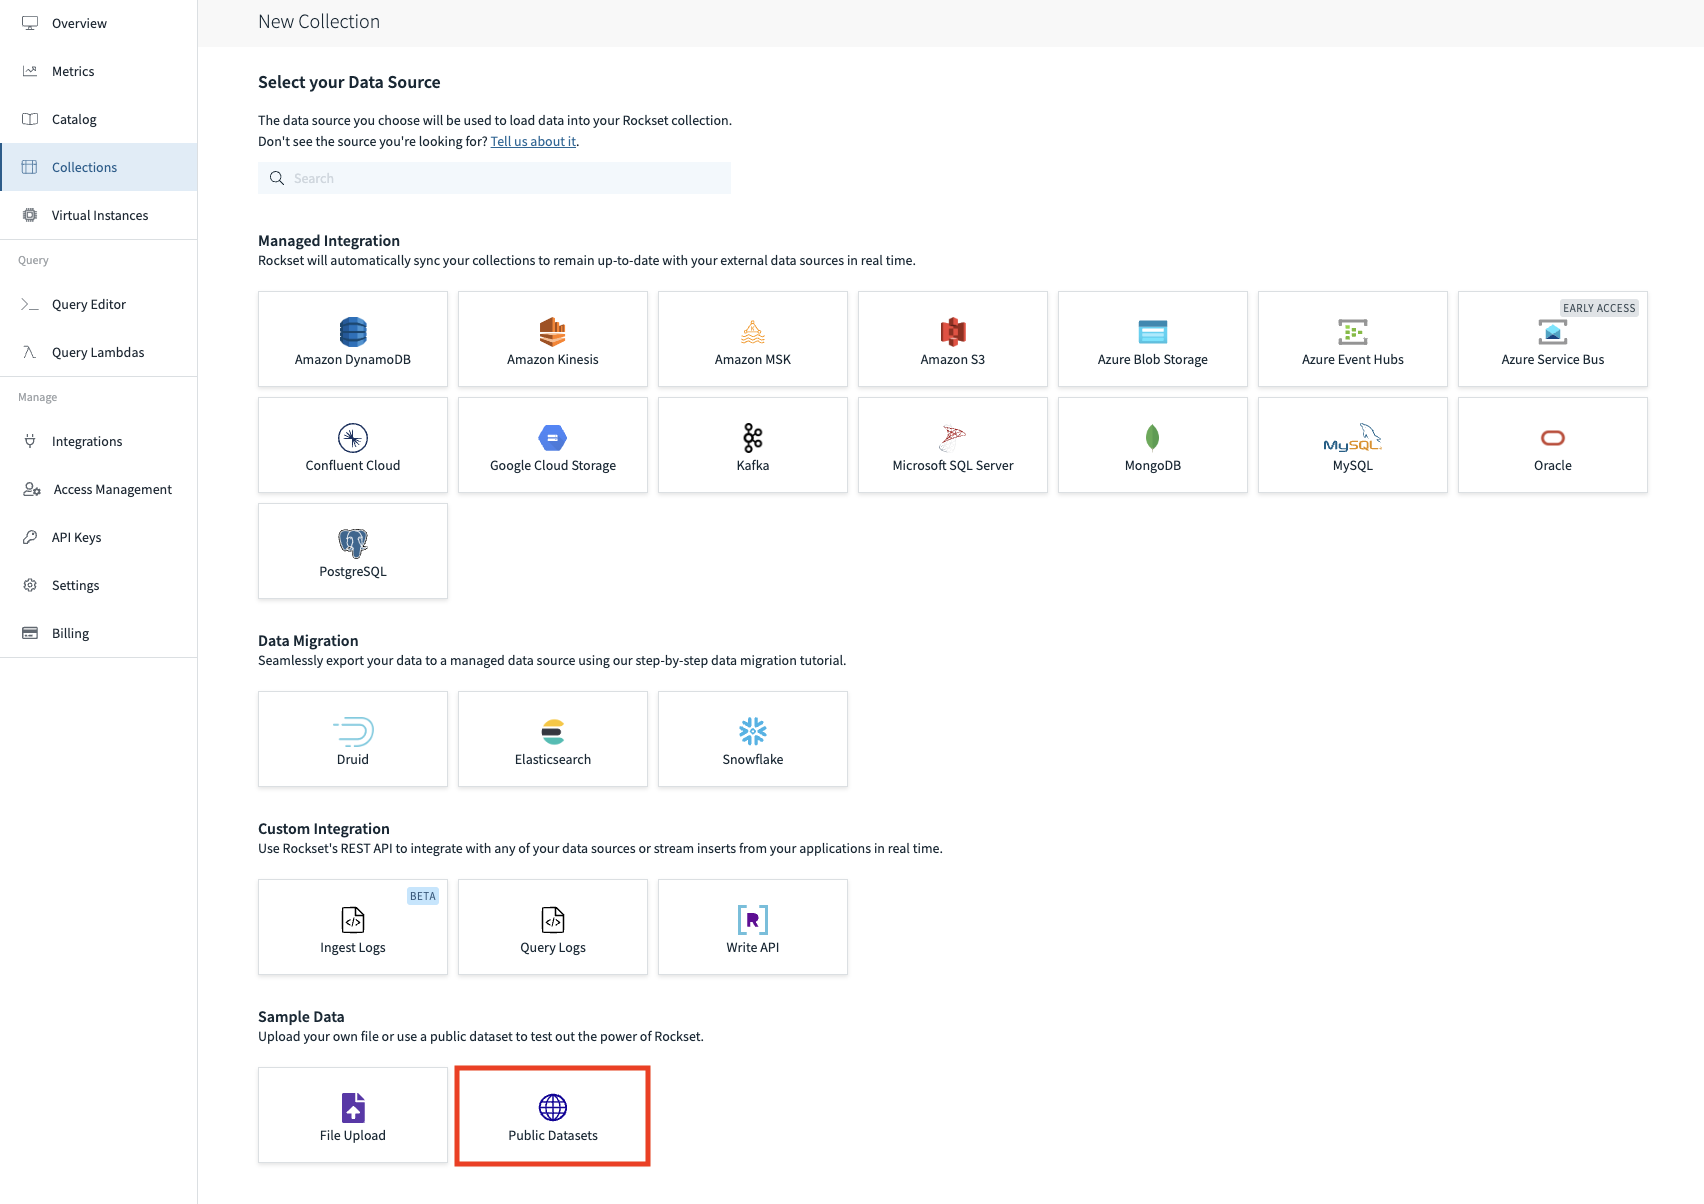
Select "Public Datasets" as the data source for your collection:
-
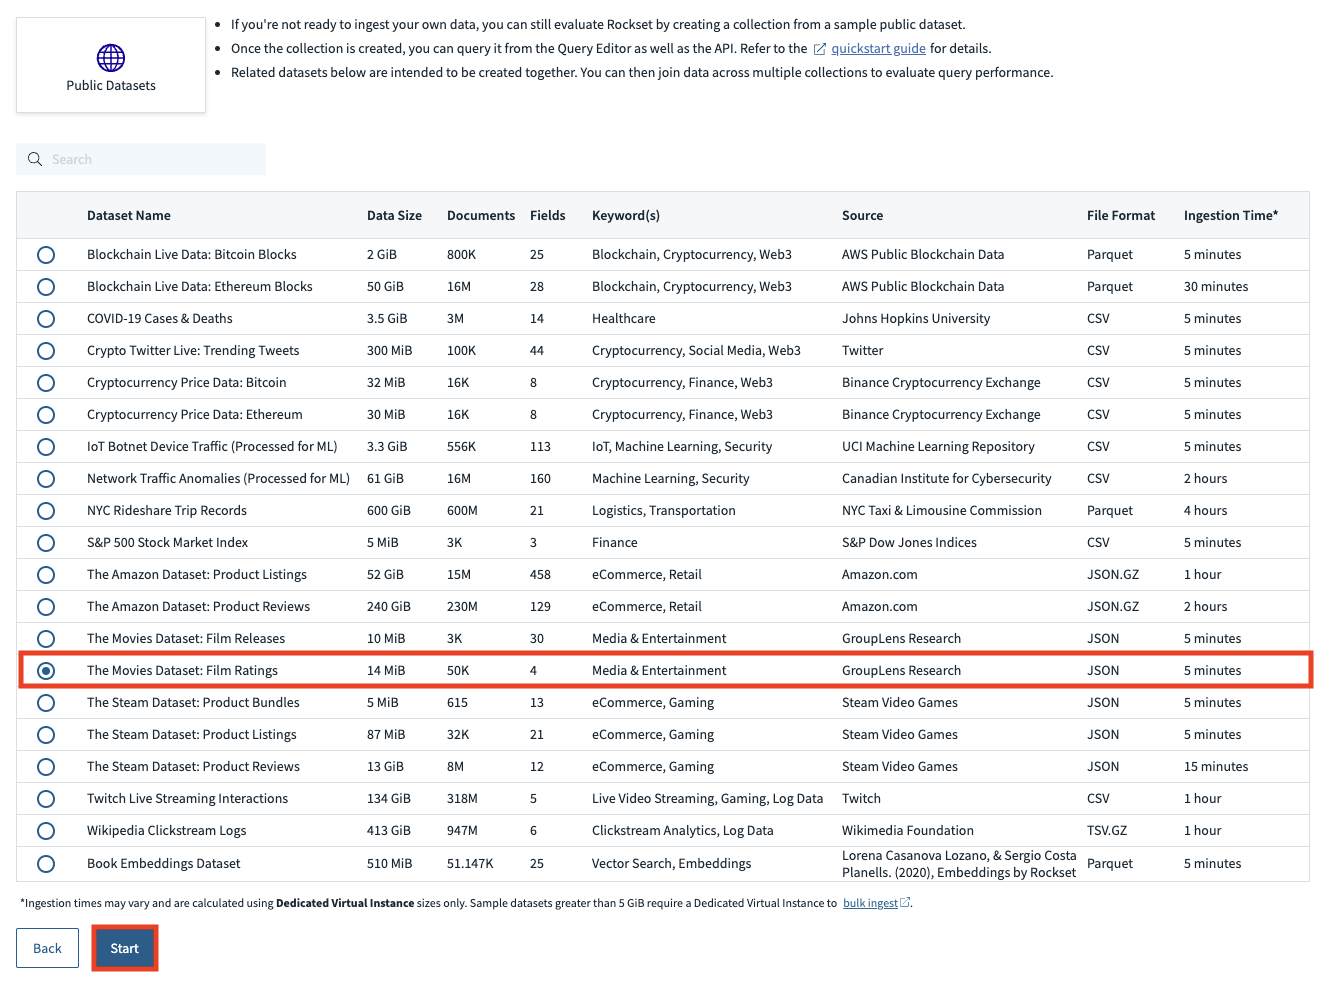
Select the dataset "The Movies Dataset: Film Releases" and click "Start" button below:

-
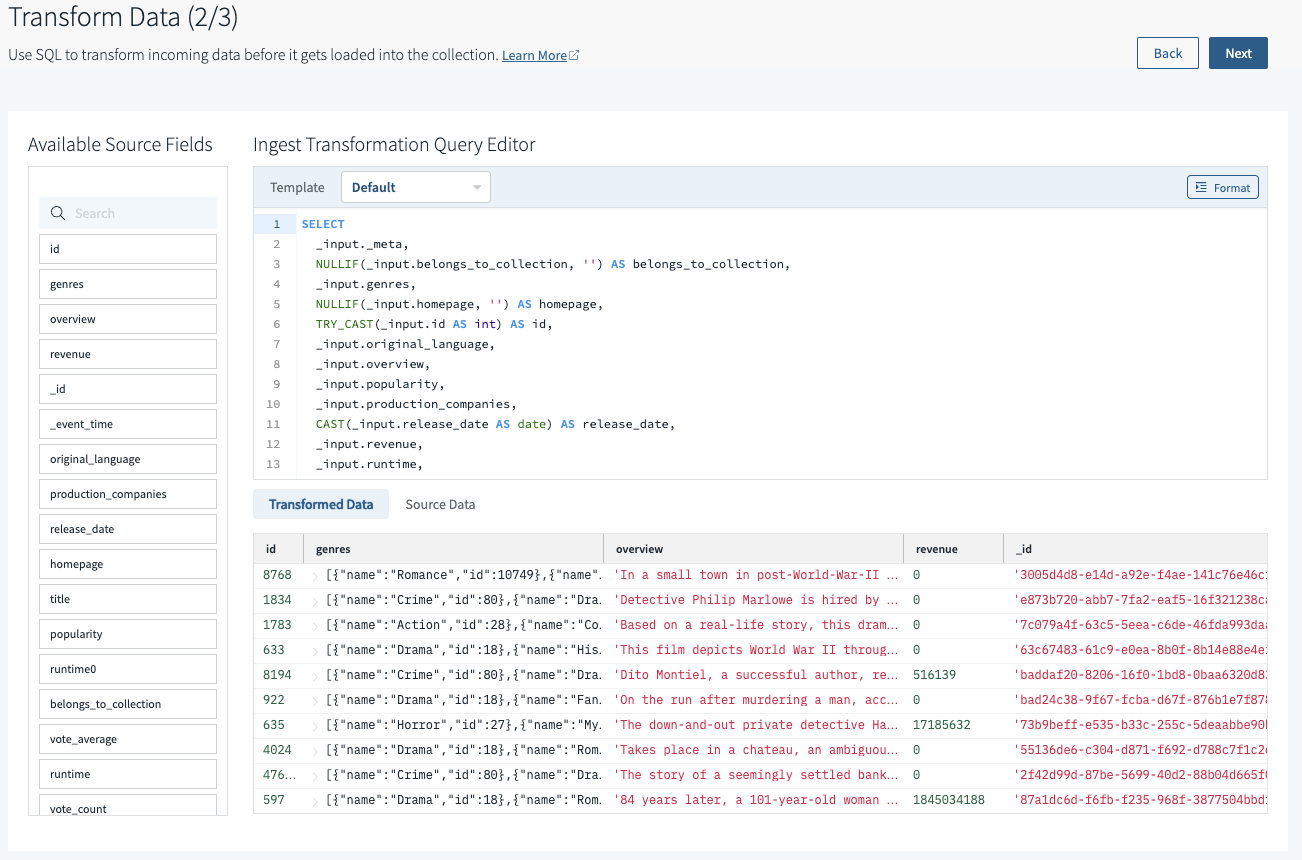
Under the Transform Data section, you will see that an Ingest Transformation has already been predefined for you. Ingest Transformations are SQL queries that execute on data before it is stored in Rockset. For the purposes of this tutorial, we recommend that you do not change the predefined ingest transformation as our sample queries later on may be affected.
The source preview is automatically generated so you can explore the semi-structured JSON data in a tabulated form:
-
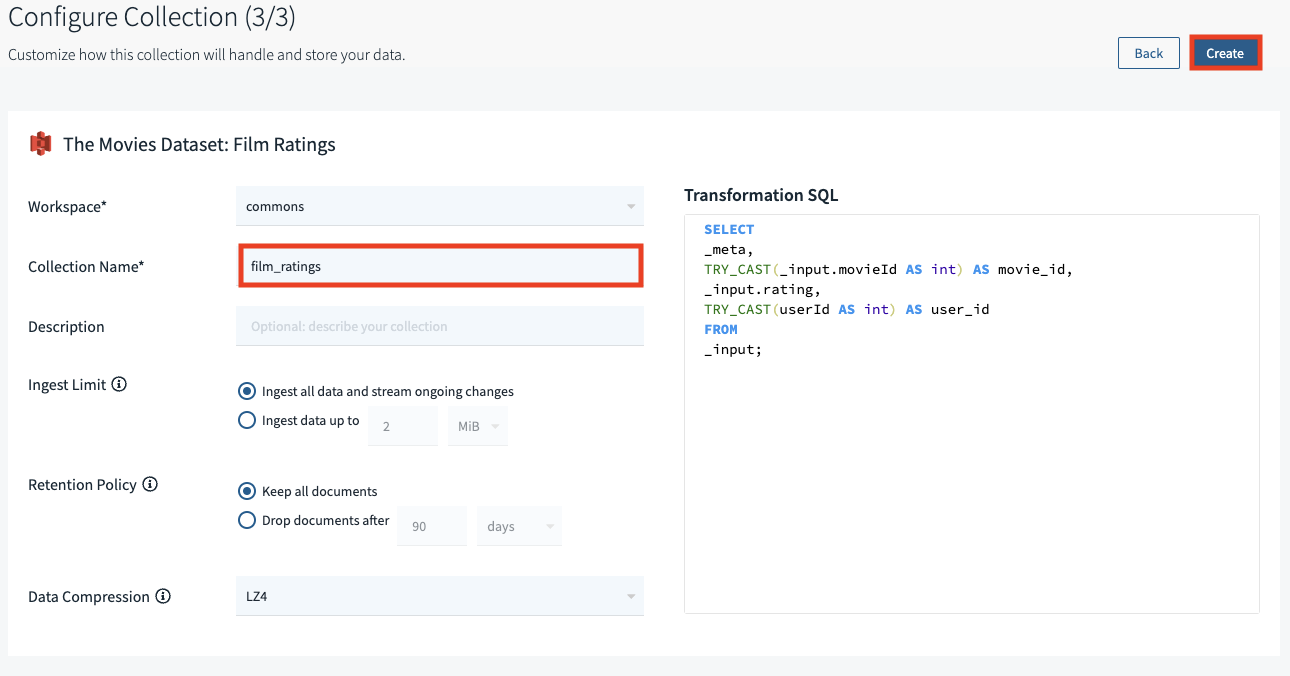
Name your collection
film_releasesin the Collection Name field. When you're ready, click "Create" at the top right of the page to complete the creation of your collection.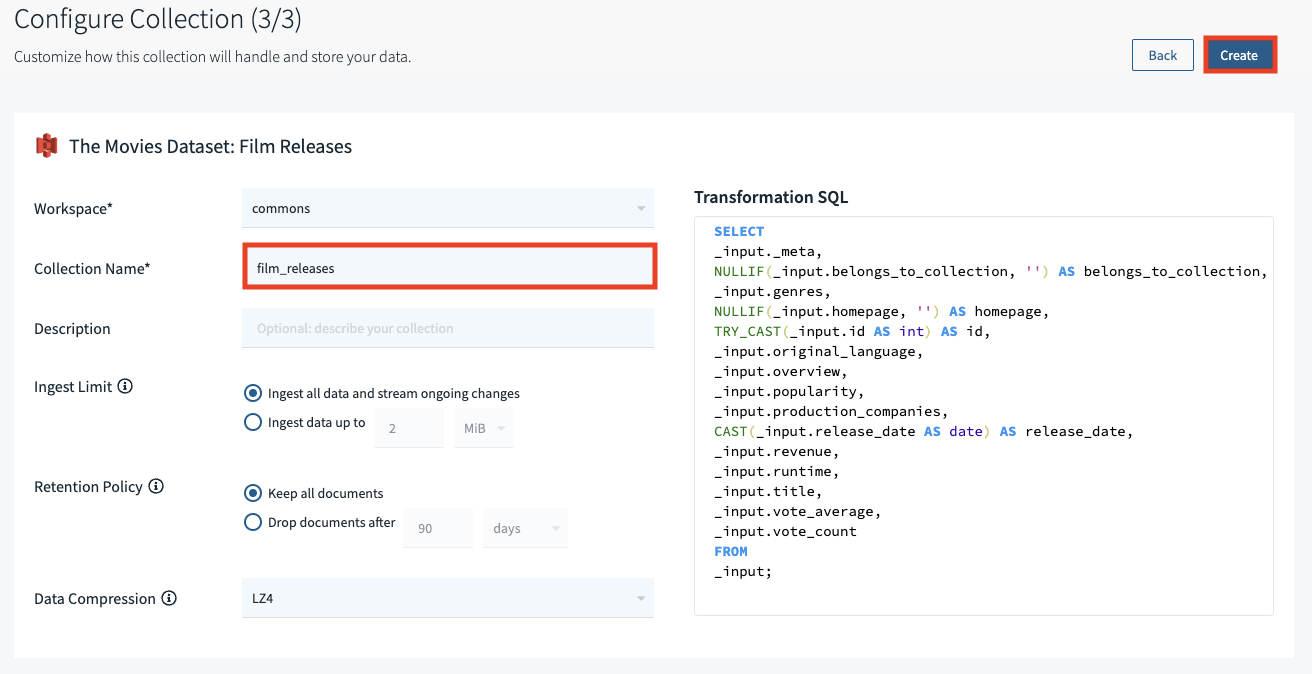
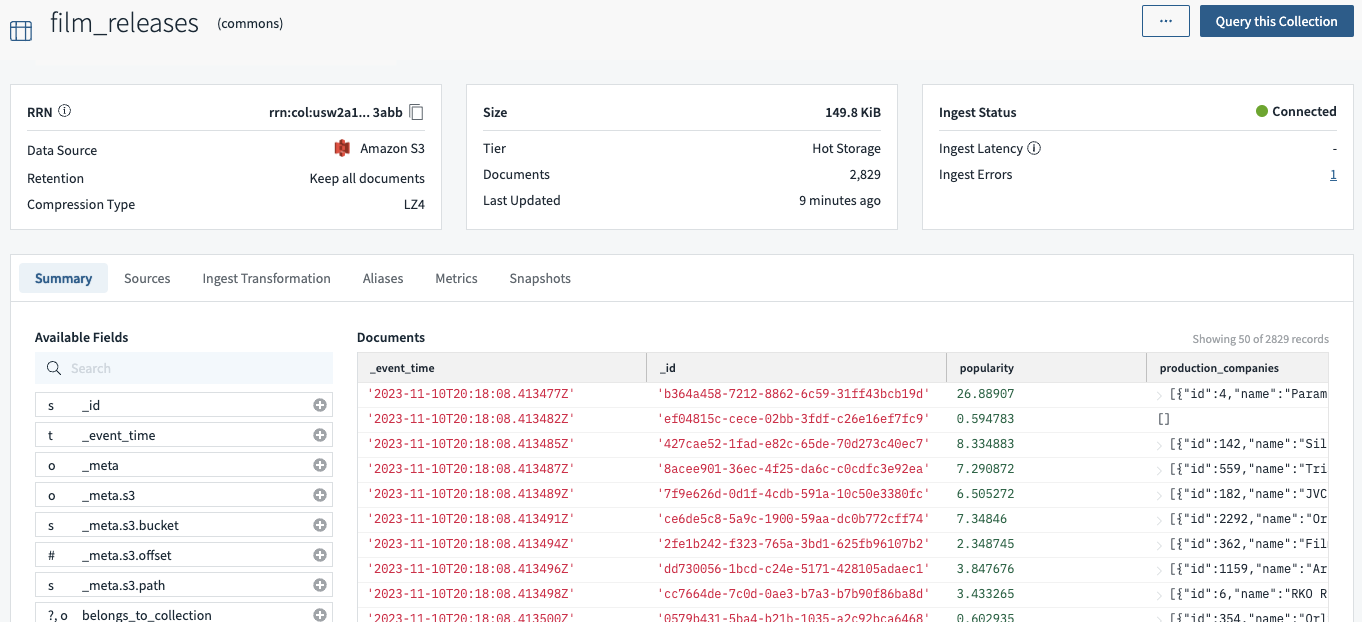
The collection creation process will take about 3 minutes to complete. Documents will begin to flow into the collection gradually until the entire dataset is ingested. You may need to refresh the screen for the status to update. When completed, you should see something like this:
Create the Film Ratings Collection
Now repeat the same steps above to create the Film Ratings collection. This time select the dataset "The Movies Dataset: Film Ratings" and name your collection film_ratings in the Collection Name field.
Execute a Query
Now that both collections have been set up, let's navigate to the Query Editor tab of the Rockset Console to start writing and executing SQL queries!
Sample Query
Below is a sample query that suggests movies to a user based on their genre preference and the movie's rating. Since genre is an array field (as a single movie may fit multiple genres), we use UNNEST to expand this array and create a record for each (genre, movie) pair. We'll also choose to exclude movies rated by a specified user.
 SELECT
     m.id,
     m.title
 FROM
     commons.film_releases m,
     UNNEST(m.genres) as genres
 WHERE
     genres.name = 'Action'
     AND m.id NOT IN (
         SELECT
             r.movie_id
         FROM
             commons.film_ratings r
         WHERE
             r.user_id = 100
     )
 ORDER BY
     m.popularity DESC
 ;
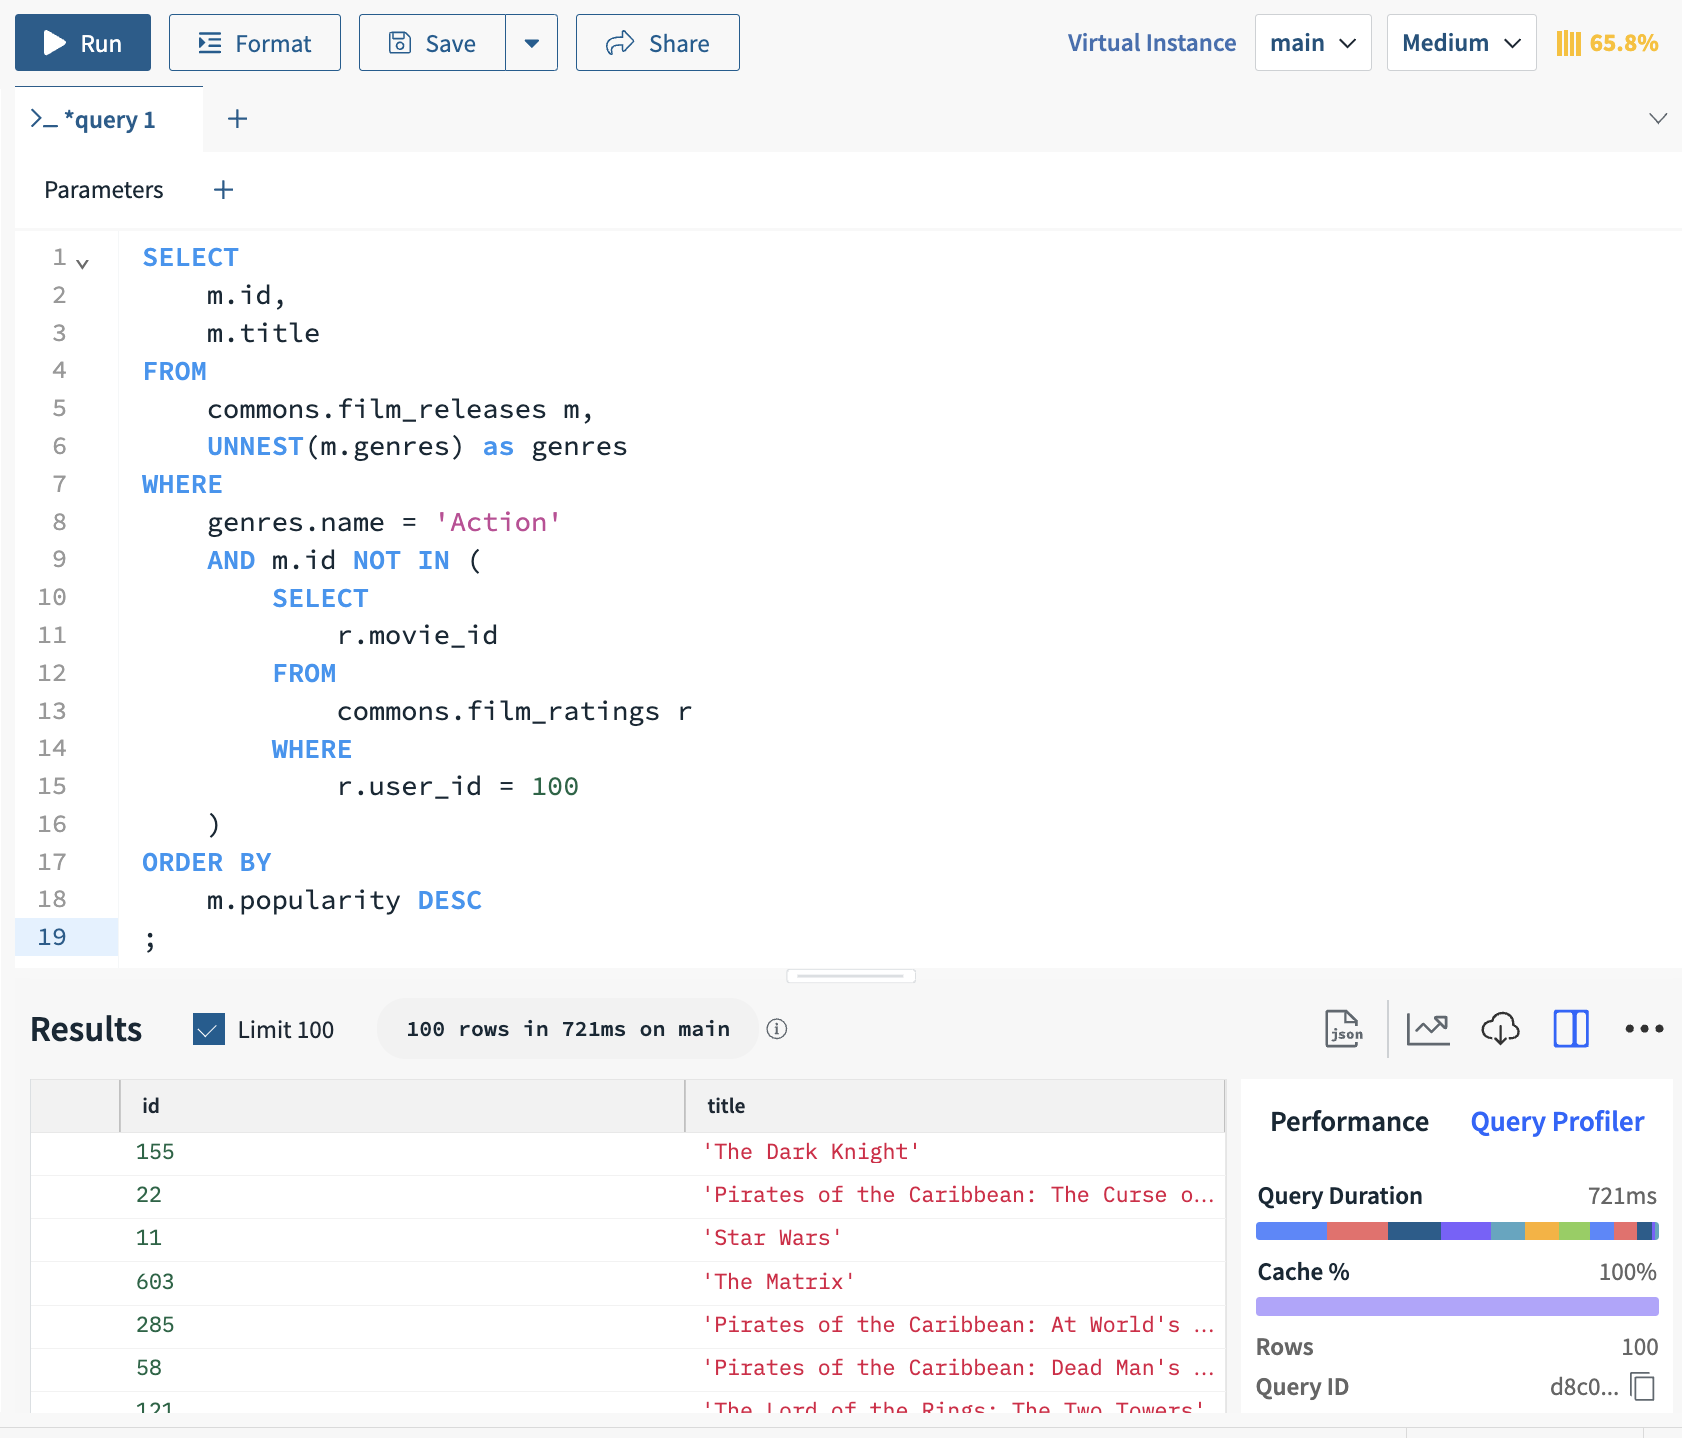
Copy the query above into the SQL editing area in the Query Editor tab of the Rockset Console. Click "Run" to execute the query. The Results tab shows the returned rows:
Sample Query with Parameters
In the above query, we used the Action genre and user 100. Now, let's make these values parameters that can be specified at runtime.
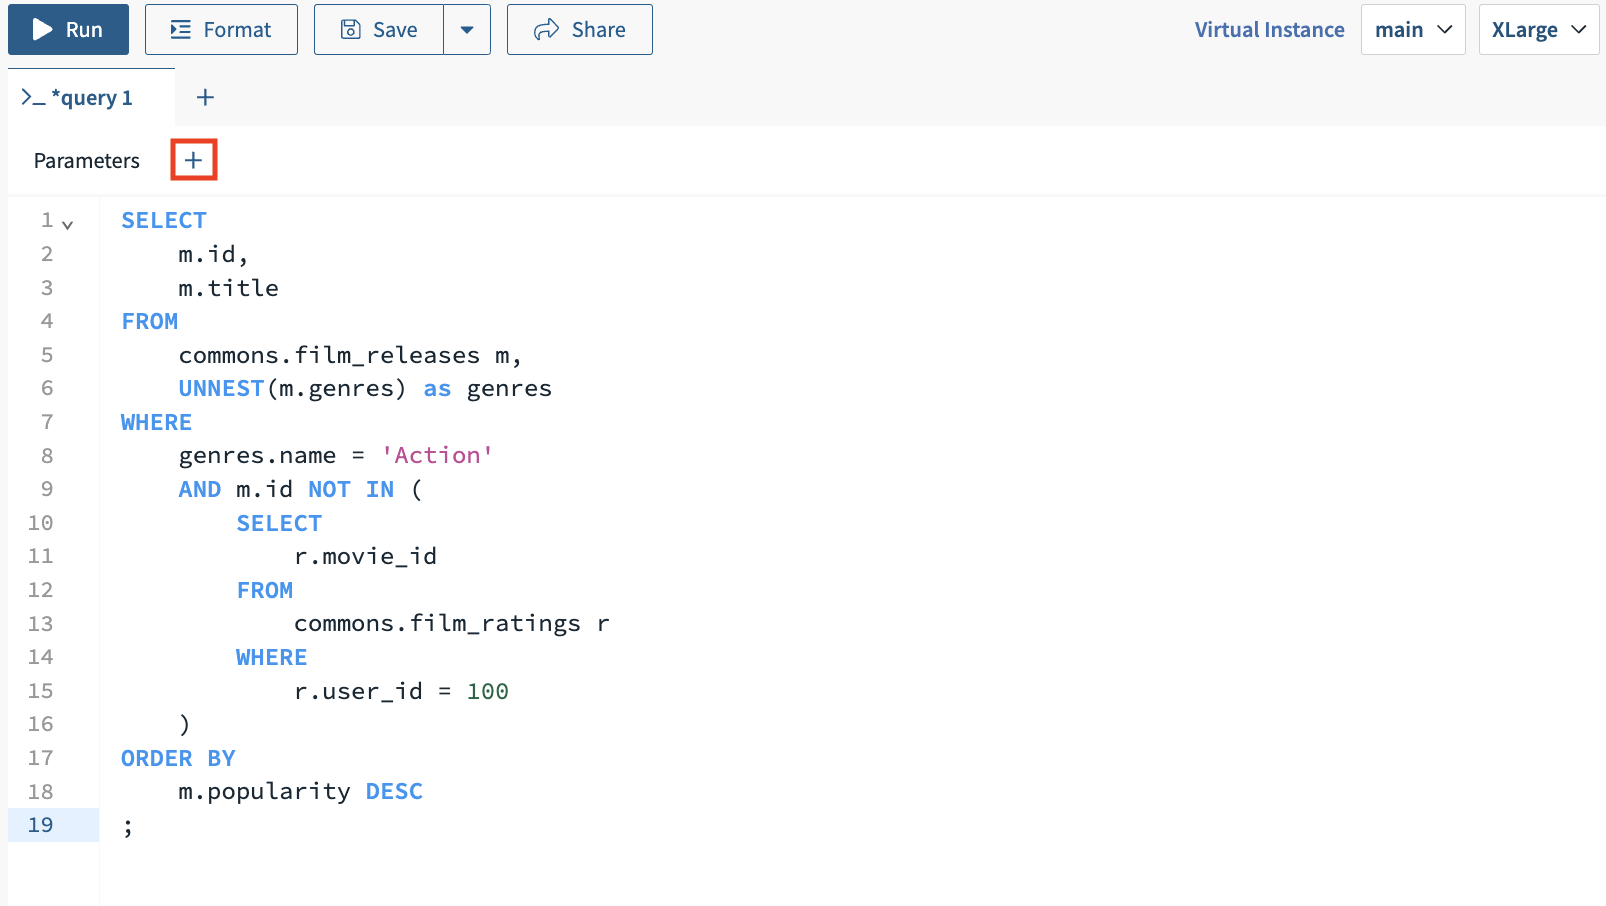
-
Click the "+" next to "Parameters" located below the query name tab to create a new parameter:
-
Populate the parameter details with the following:
- Set Parameter Name to
genre. - Set Type to
string. - Set Parameter Value to
Action.

- Set Parameter Name to
-
Repeat Step 2 with the following parameter details:
- Set Parameter name to
user_id. - Set Type to
int. - Set Parameter Value to
100.
- Set Parameter name to
-
Modify the SQL statement from the previous section to incorporate the parameters created in steps 2 and 3 above:
- Replace
genres.name = 'Action'withgenres.name = :genre. - Replace
r.user_id = 100withr.user_id = :user_id.
Here is the new SQL statement with these updates:
SELECT m.id, m.title FROM commons.film_releases m, UNNEST(m.genres) as genres WHERE genres.name = :genre AND m.id NOT IN ( SELECT r.movie_id FROM commons.film_ratings r WHERE r.user_id = :user_id ) ORDER BY m.popularity DESC ; - Replace
-
Click "Run" to execute the query. The Results tab below the query shows the rows returned for the
Actiongenre with the User ID100: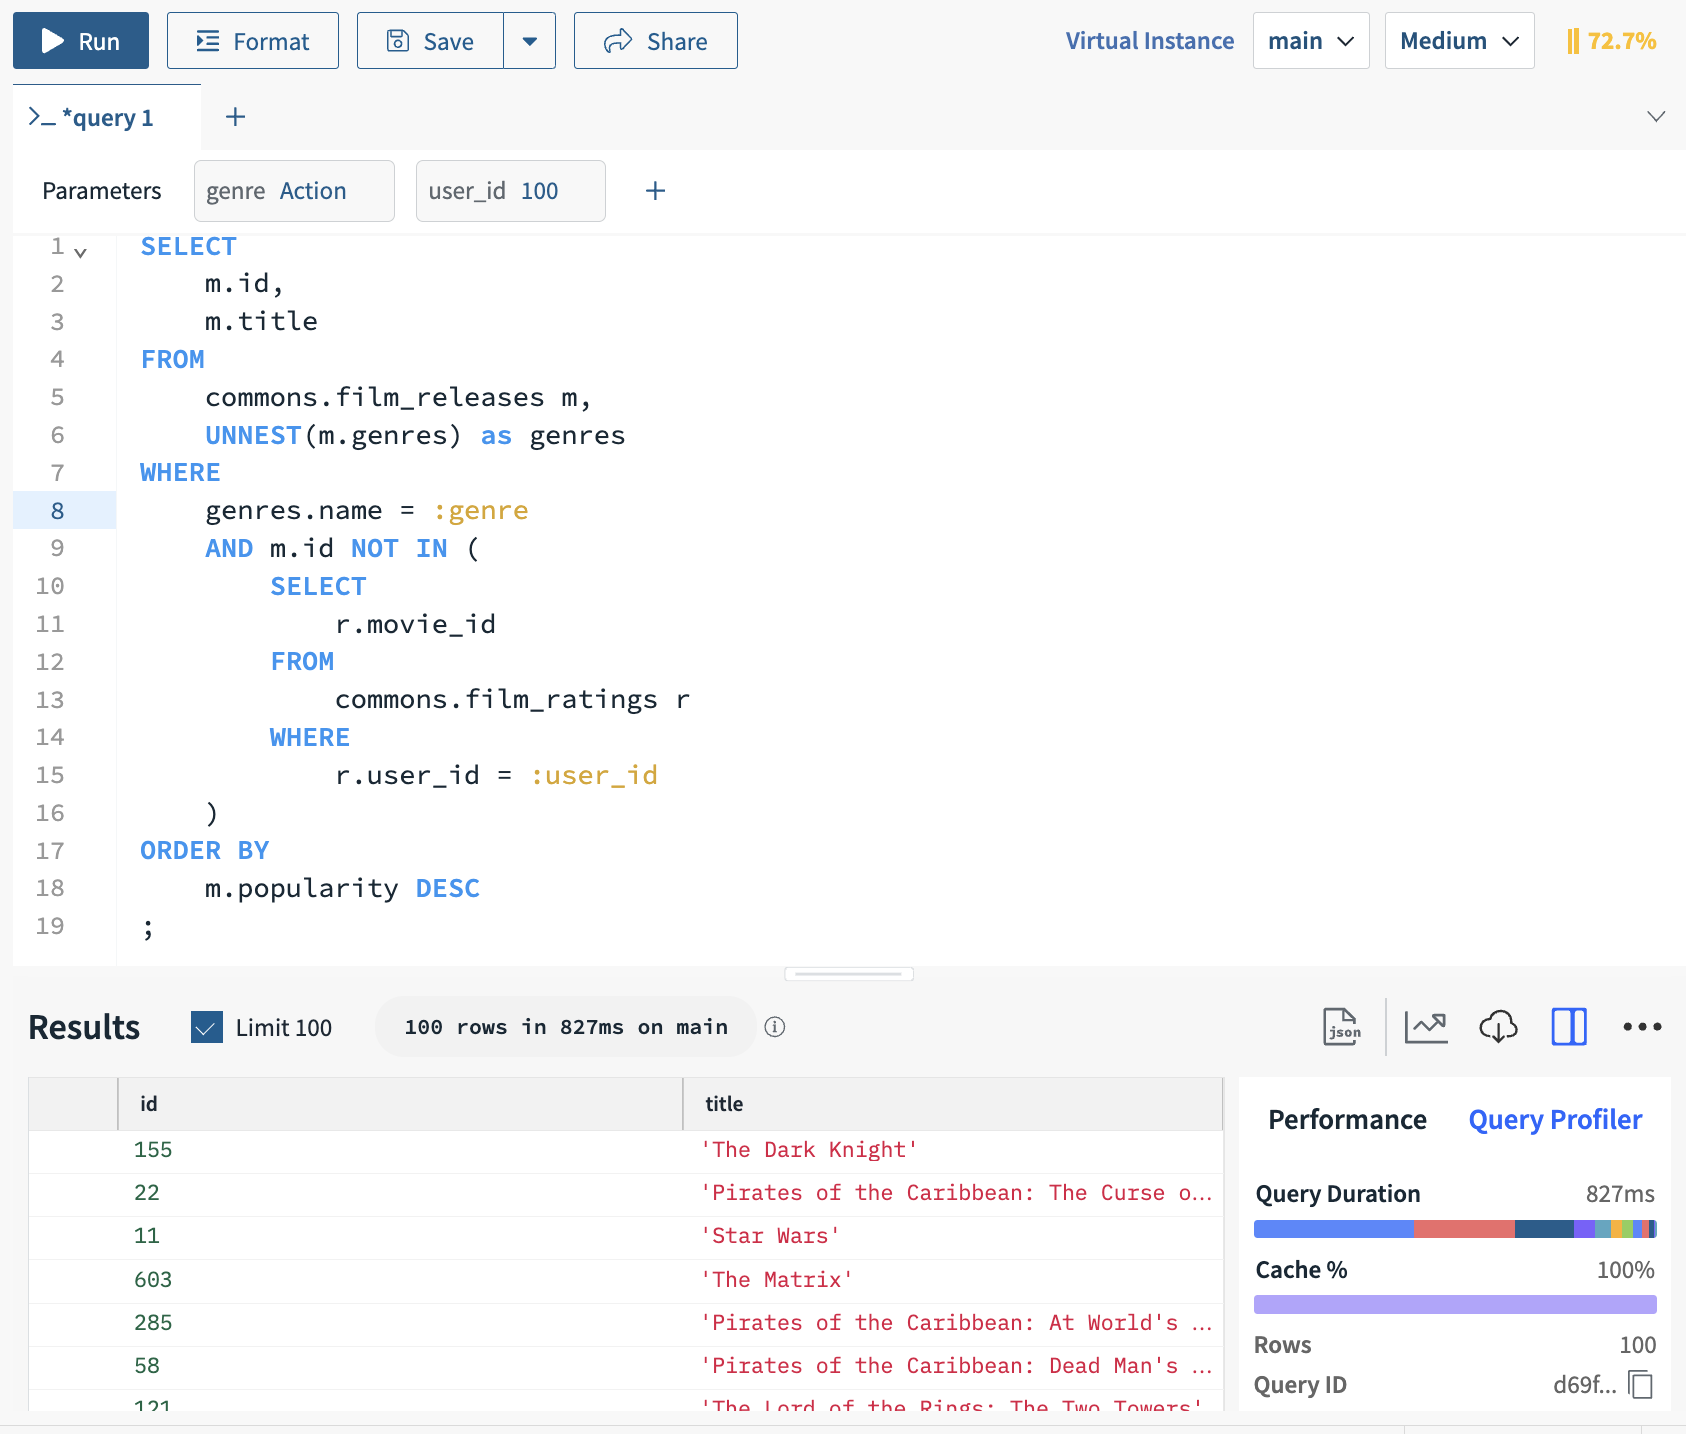
Next Steps
This completes the Quickstart tutorial! Here are some suggestions for next steps:
-
Keep building by checking out some of the pages below to continue exploring Rockset:
-
Invite other members of your team to your organization in the Users tab of the Rockset Console. You can determine if each new user should have Administrator, Member, or Read-Only access to Rockset. Check out our docs on User Management.
-
Check out our Rockset community and share what you are looking to build with Rockset. We’re hanging out and ready to answer your questions!
Updated 4 months ago